Coupa Supplier Portal (‘CSP’).
Coupa is the tool used by Mitie to onboard new Suppliers as well as to maintain and amend existing Supplier details. This is used to support Supplier Onboarding at Mitie. This training script will detail how Suppliers can complete the Mitie New Supplier Onboarding in the CSP Account.
Receive an email invitation to join the Coupa Supplier Portal(‘CSP’).
The Primary contact receives an email invitation with a notification to Join Coupa, the primary contact who accepts the initial invite on the CSP will become the CSP Admin for your company.
1. Click Join and Respond to create a Coupa account.
This will allow you to register and complete your Form.
NOTE:
- Joining the CSP will also allow you to update supplier details directly in the portal should the need arise at a later date.
- Mitie is in the process of rolling out additional Coupa functionality to our Suppliers, including the submission of electronic invoices. Suppliers should refer to https://mitiesuppliers.com for further details.

Create your business account
2. Set up your log in credentials and tick “I accept the Privacy Policy and Terms of Use”.
3. Click Get Started when ready.

If you need to Change your CSP Account Language (includes dates formats)
- You can change your CSP language, click on the language button (English (UK) shown below)This can be found at the bottom of your CSP screen

- Select your required Language from the pop up

- Once you select the required Language you will see your CSP account update.(if your account was English (US) and you change to English (UK) you will notice the date formats change to UK format from US format)
Tell us about your business.
4. Review your Company name and Address details. Some of this information will have been pre-populated by Mitie, but may be edited if required.
5. Click Next and then Take Me There.


Milestone reached!
You have just completed your Coupa Supplier Portal initial setup and are ready to complete your form, please see below:
Mitie Supplier Form
You can now see the Mitie Supplier Form. Some information has been pre-populated.
All fields marked with a red asterisk (*) are mandatory.
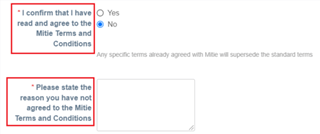
6. Download, read and agree to Mitie Terms and Conditions.

NOTE: If you decline to accept the Mitie Terms and Conditions, it means you cannot work with Mitie.
Should you have any questions, please use the Comments section.
7. Review and complete questions on Modern Slavery, Procurement and Social Value Policy.
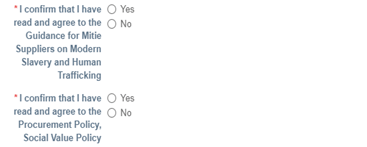
If you will only be providing goods or services Offsite, please proceed to Step 6.
Onsite Services
If you will be providing services onsite, then:
8.Confirm that you agree with the Contractor Handbook and Contractor Rules. This can be found at https://mitiesuppliers.com/supplier-guides/
9. Input your Alcumus number.
NOTE: You must enter your Alcumus number if you selected Yes under ‘Will you be providing any services on site?’

If not already registered on Alcumus you will need to do so. Navigate to the Alcumus website and register to receive an Alcumus number:
*For onsite working, Mitie will be unable to progress the onboarding process without this information.
Basic Details
10. Check the Company Name and Address details which have been pre-populated.
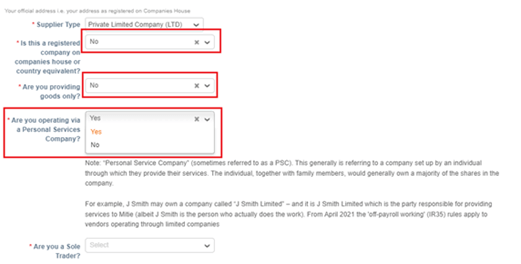
11. Select a Supplier Type (i.e., Private Limited Company, Sole Trader etc)
12. If the Company is registered on Companies House, select Yes.
The Company Registration Number may be defaulted from the initial request, if not please provide it or amend as required.

13. If your Company is not registered on Companies House, select No.
14. Specify if you Are providing goods only.
15. Confirm if you are operating via a Personal Services Company.
16. If you answered No to being registered on Companies House, then you will need to confirm you are a Sole Trader.
17. If applicable, input your 9-digit DUNS Number,
18. Complete the following fields:
a) Preferred Currency
b) Organisation Size

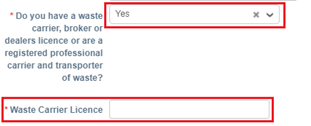
19. Review the Question: Do you have a waste carrier, broker or dealers’ licence or are a registered professional carrier and transporter of waste?
20. If you choose Yes from the drop-down, a new question will pop-up asking you to fill in your Waste Carrier Licence details.
21. Proceed to completing your Bank Details.
Bank Details
22. Select Yes under Bank details, make sure you read the prompt regarding any future updates to your banking information.

23. Click Add Remit To and then Create Remit to Address.

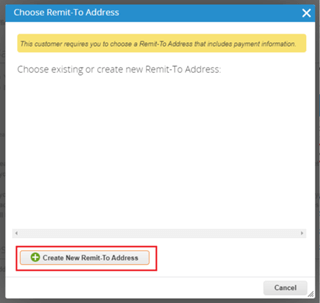
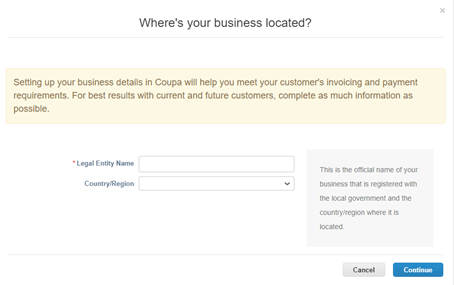
24. Required fields:
Complete the ‘Where’s your business located’ section, then click Continue.
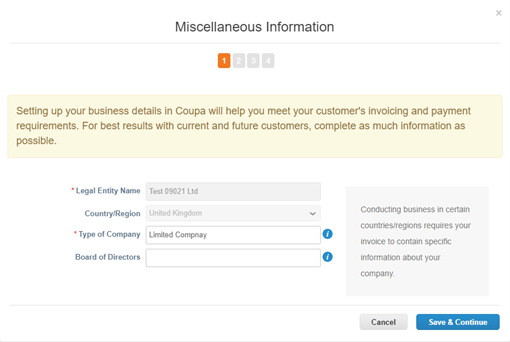
25. Complete the ‘Miscellaneous Information’ section, then click Save & Continue
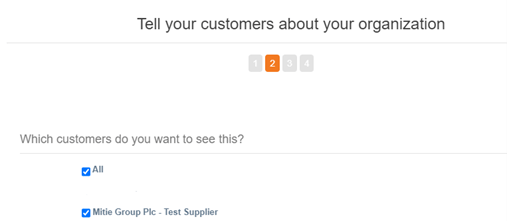
26. Which customers do you want to see this?
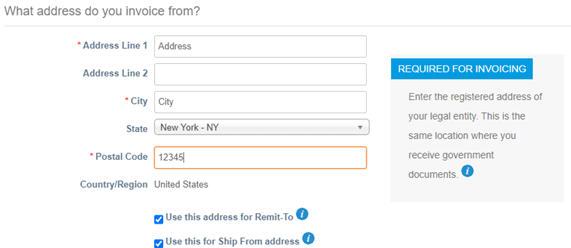
27.What address do you invoice from?
28. What is your Tax ID?

29. Where do you want to receive payment?
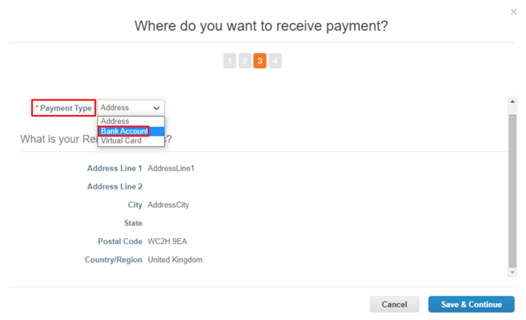
30. On the “Where do you receive payment?” pop-up select Payment Type = Bank Account.
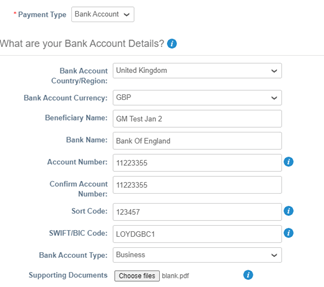
31. When Banking data and invoicing address fields are complete, click Save and Continue
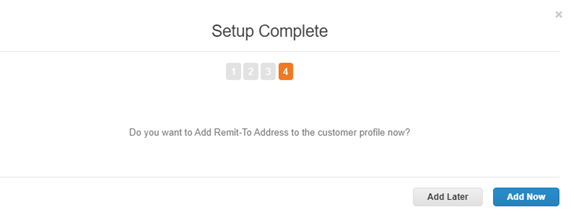
32. Click Next until you see the button Add Now. Do NOT select ‘Deactivate Legal Entity’.
Remit-To Address
33. Verify your banking information and choose Yes under “Is this a company bank account? Select No, if using a factoring agent.

34. Underneath the Bank account details, attach a signed document on company letterhead confirming your bank details signed by company authorised signatory.

Tax Details
Select Country of Operation.
35. If VAT registered, review or enter your VAT Number. (If applicable and not already populated).
36. If you are not VAT registered, select No and add N/A in the VAT Number field.
37. If you are registered under the Construction Industry Scheme fill in the Unique tax reference (UTR) Number and CIS Registered Trading Name.

Check Primary Contact details
Please Note: You must provide your Phone Number
Any additional users can be added to the CSP at a later stage by your primary contact.
38. Fill in the PO Email.

Insurance Details
39. Fill in details under Employers’ Liability Insurance.
Answer the questions. Please ensure you enter the value of your insurance in the following way: £X,000,000
40. Ensure you attach copies of relevant insurances.
41. Make sure to select the Expiration Date.

42. Repeat the steps for Product Liability Insurance and Professional Liability Insurance.
Please Note: this form will not be approved without valid insurance information.
43. Click Submit for Approval.

Please note, if at any point, you spot a mistake in the information provided in your Information form while it is still pending approval, you can correct it by withdrawing it, making the necessary changes and re-submitting it for approval.
44. If necessary, click Withdraw.

45. When information is correct, click Submit for Approval.
Please note, you will be sent automated reminders if the form is not completed at the following intervals:
- First Reminder: After 2 days
- Second Reminder: After 5 days
- Third Reminder: After 10 days
- Final Reminder: After 15 days
The request will be cancelled after 30 days, and you will no longer be able to complete the form.
If required, your onboarding process will have to start again.
Milestone reached!
Your completed Supplier form is pending approval with Mitie. When your response is approved, you will be notified that your onboarding have been successful. For rejection, please see below:
If your supplier form is rejected:
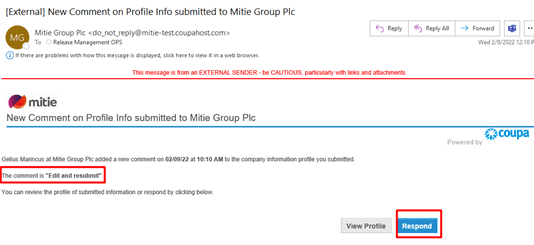
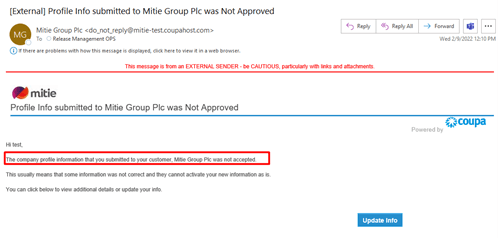
46. You will be notified via email that the submitted form response was not accepted. You will also receive an email with comments added by the Mitie Vendor Maintenance team detailing the reason for rejection.
You have the option to view your profile, update and re-submit changes for Approval.
47. Click Respond or Update info. This will take you back at step 4 giving you access to the Mitie Supplier form.
48. Your initial answers on the form will be defaulted, change the details that were flagged in the rejection comment and click Submit for Approval.
You have re-submitted your supplier form and it is now pending approval with Mitie. Once the changes have been reviewed and approved you will be notified via email, as well as in the Coupa Supplier Portal (CSP) account.
Milestone Reached!
That completes your CSP registration and you will be ready to receive Mitie POs and start invoicing.
Further Support for the Coupa Supplier Portal
To access more Training material on How to start using the Coupa Supplier Portal click here.
