How to Create and Submit a Credit Note.
Coupa Supplier Portal (‘CSP’).
Coupa is Mitie’s new Source to Pay (S2P) system has changed the way we do business with all our suppliers, making it more efficient and effective, bringing in simpler invoicing and better visibility of payments.
As part of this we will be introducing a new way for you to submit and managing your invoices & credit notes.
The guidance below will help you on the preferred method to raise credit notes in your Coupa Supplier Portal.
Follow the link to login to the Coupa Supplier Portal(CSP).
- Log in onto the CSP using this URL https://supplier.coupahost.com/sessions/new.
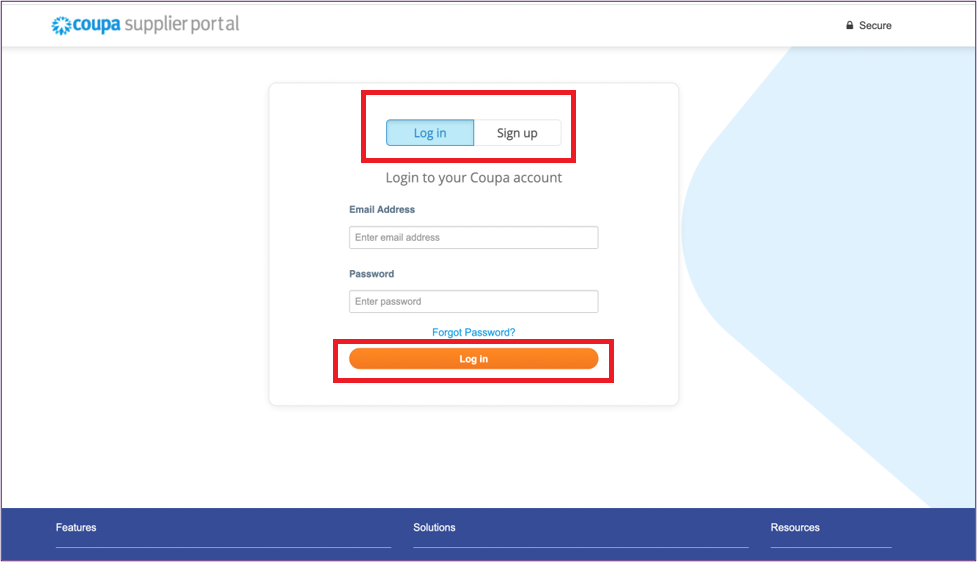
Note:
* Add this URL to your Favourites bar for future reference.
Find your Invoice.
- Select Invoices in the menu from the blue bar on top of the window.
- Click on the Invoices tab.
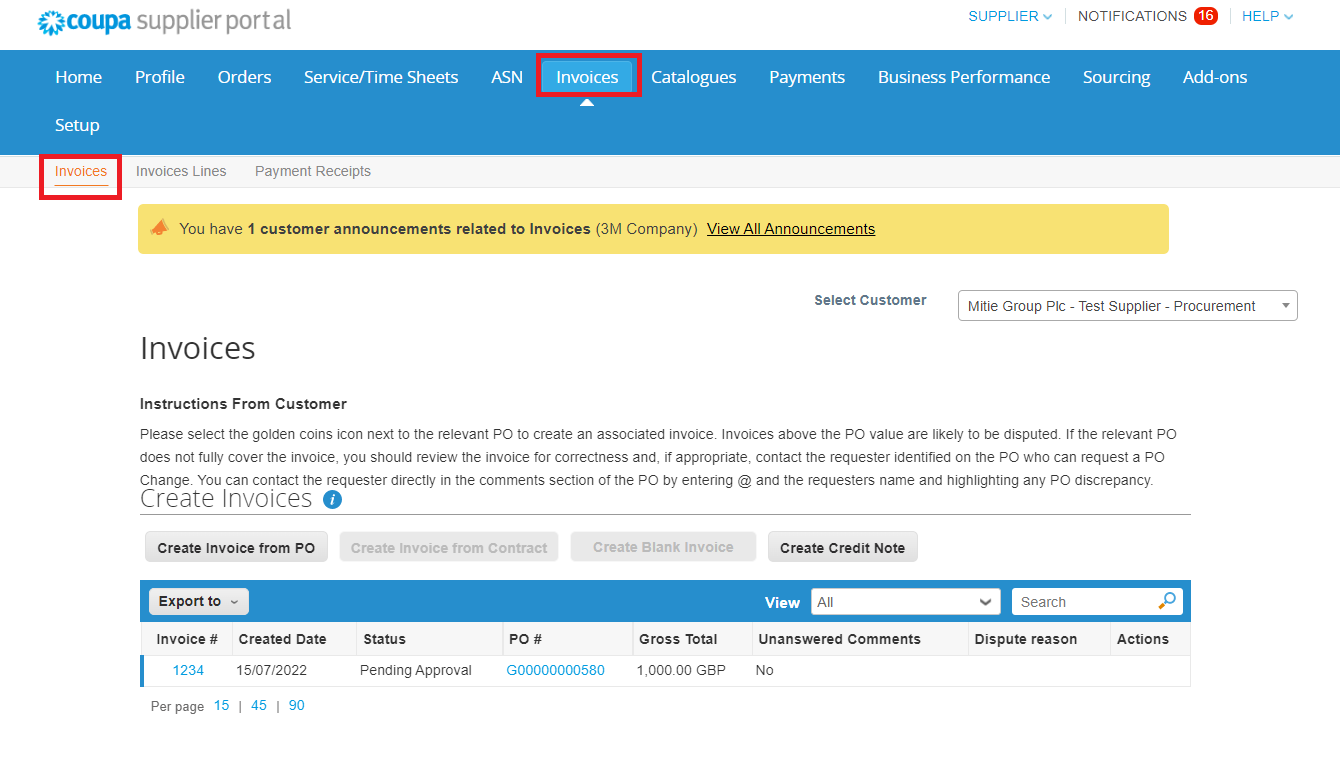
Note:
* Please use Select Customer – Mitie Group Plc. on the right corner of the screen, to see all the Invoices for Mitie.
Click Create Credit Note.
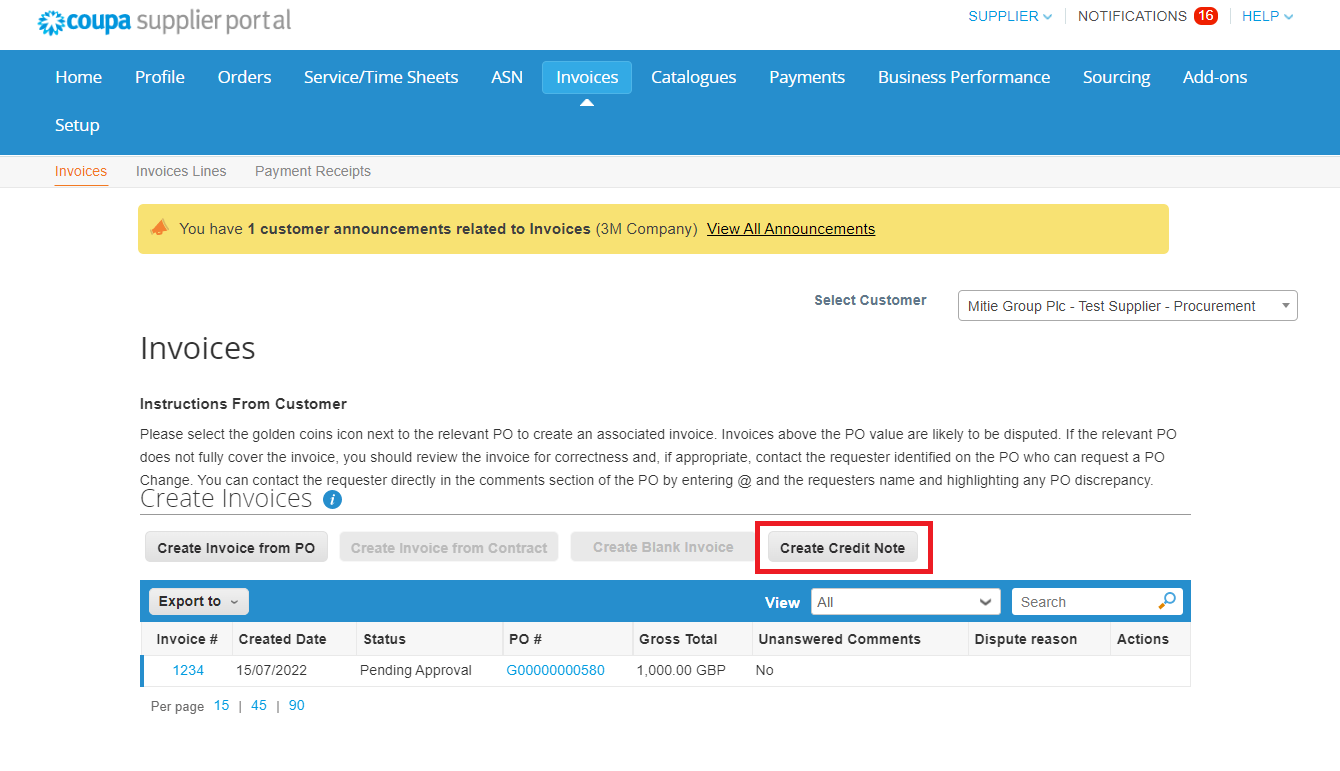
The ‘Credit Note’ window will pop up.
- Ensure that you select the radio button against ‘Resolve issue for invoice number’.
- Select the invoice number that you are crediting.
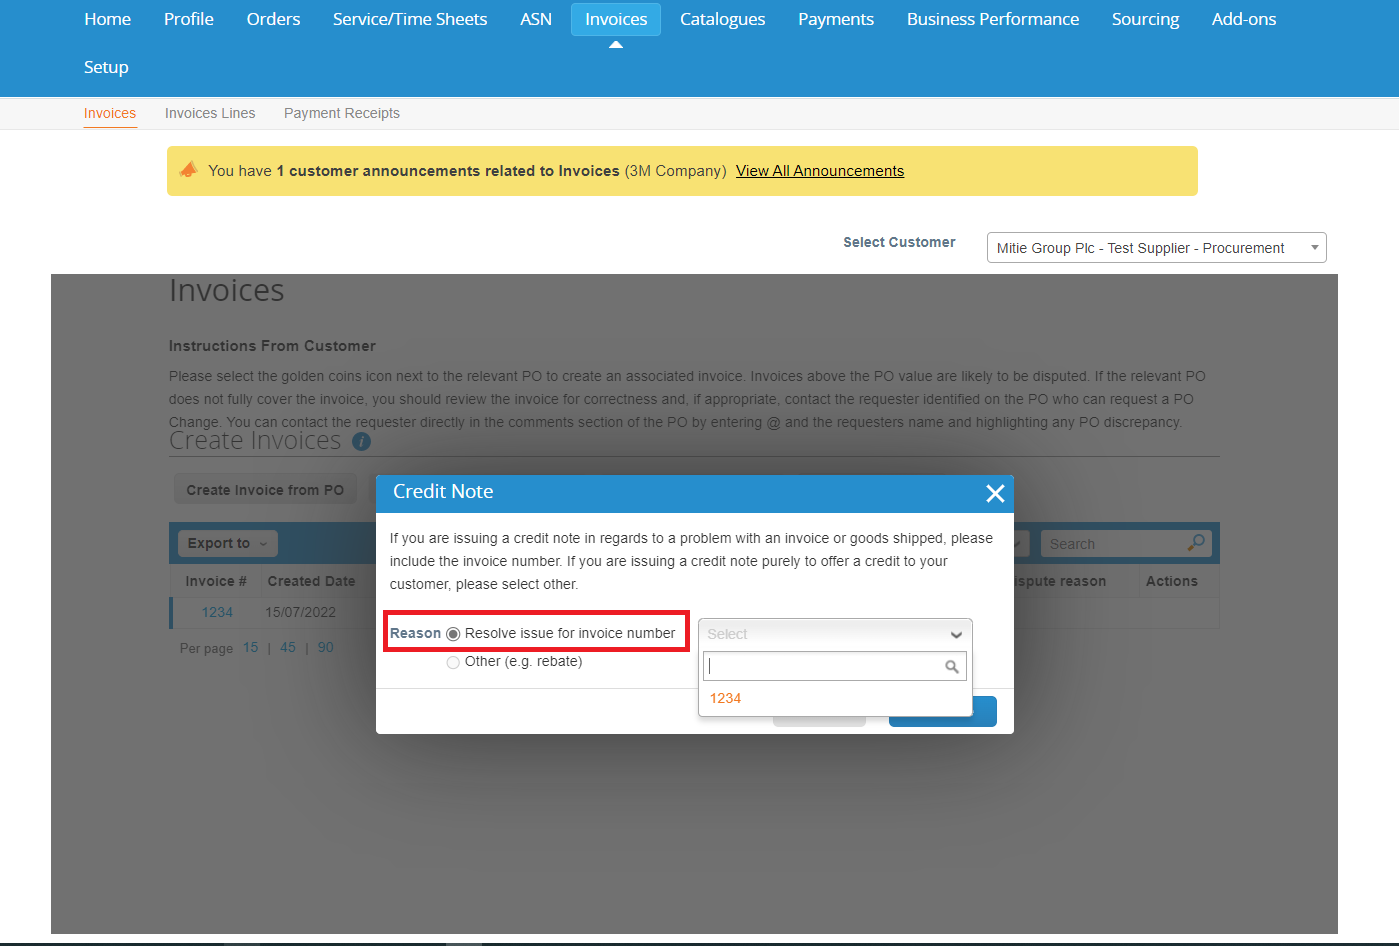
- Click ‘Continue’.
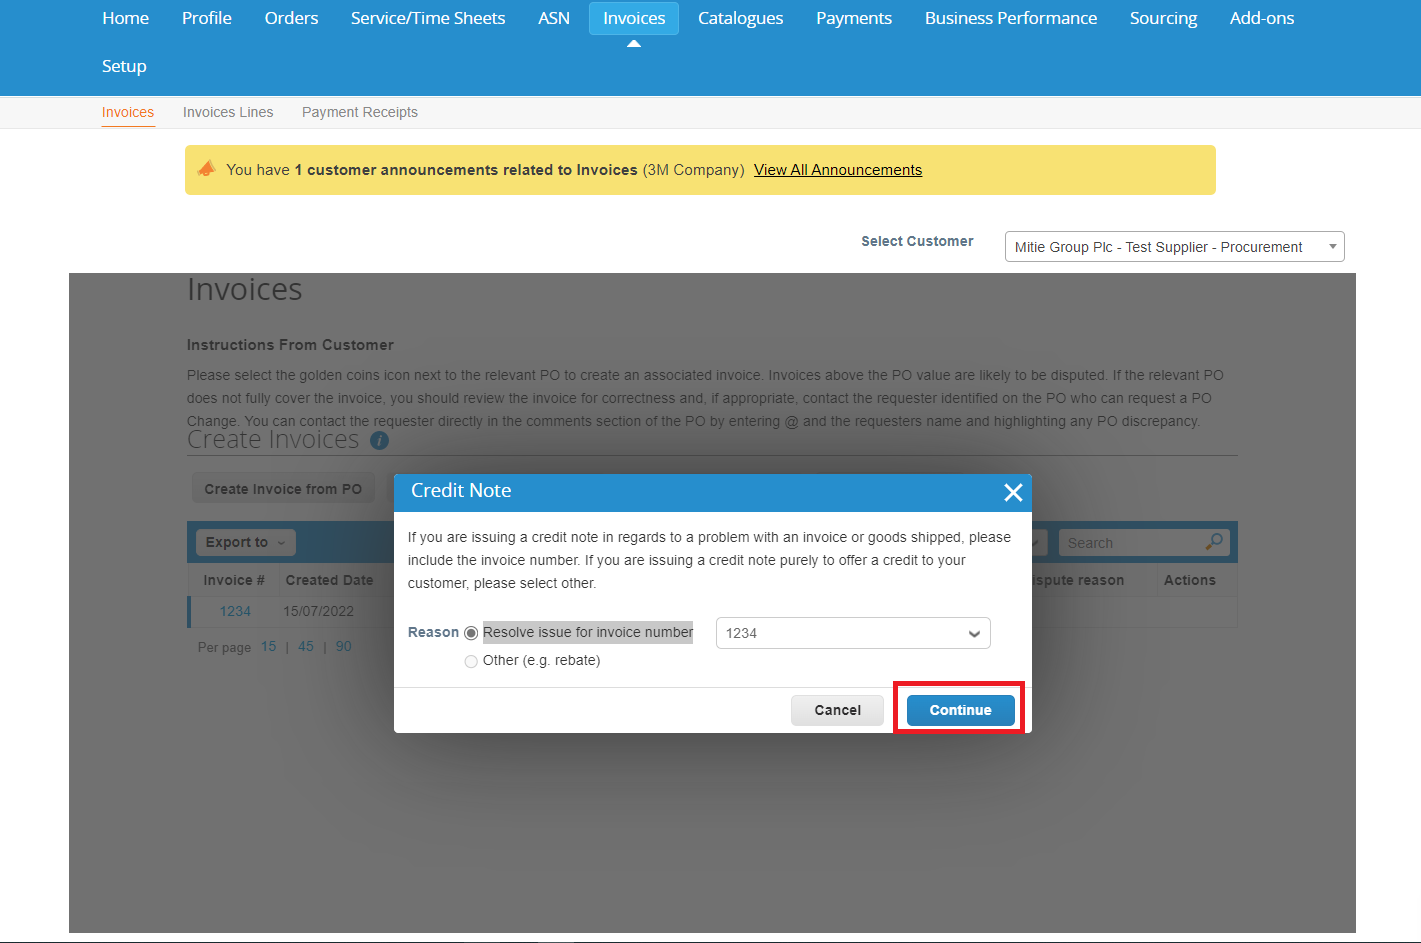
Credit Note.
It will ask, ‘How do you want to correct invoice “1234” ?
- Click ‘Completely cancel the invoice with a credit note’.
- Click ‘Create’.

The Create Credit Note details screen is displayed.
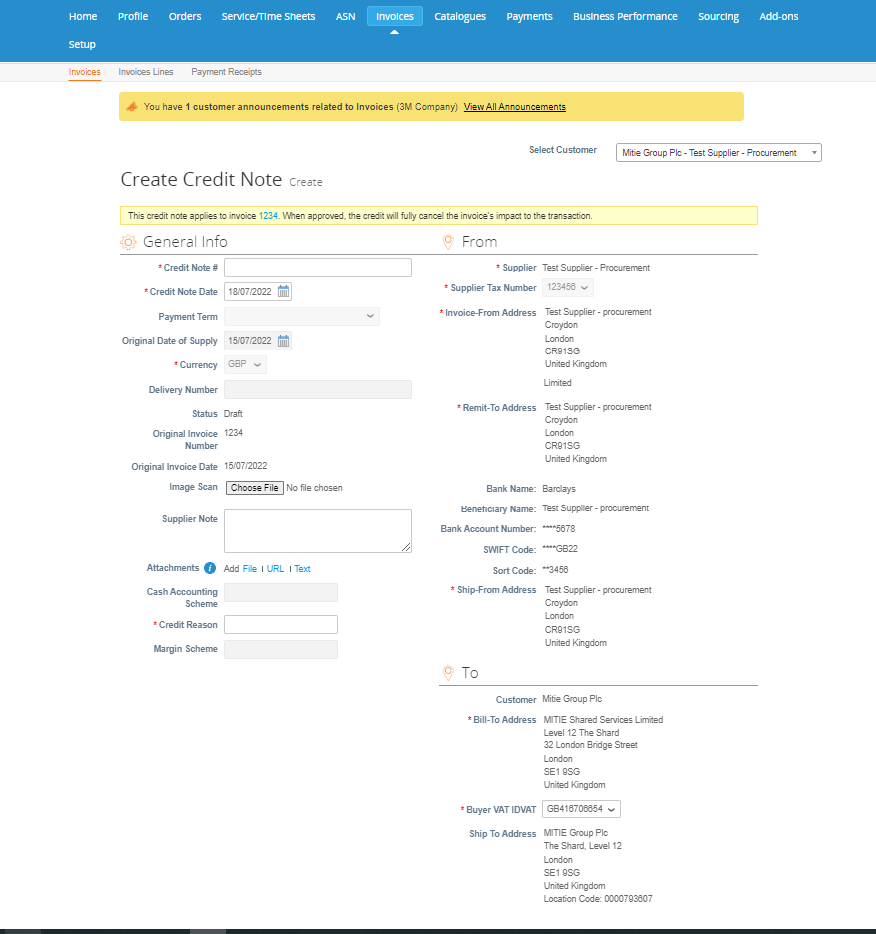
Complete the ‘General Info’ section.
- *Credit Note # – enter the credit note number.
- *Credit Note Date – enter the credit note date.
- *Credit Reason – enter the reason for the credit note.
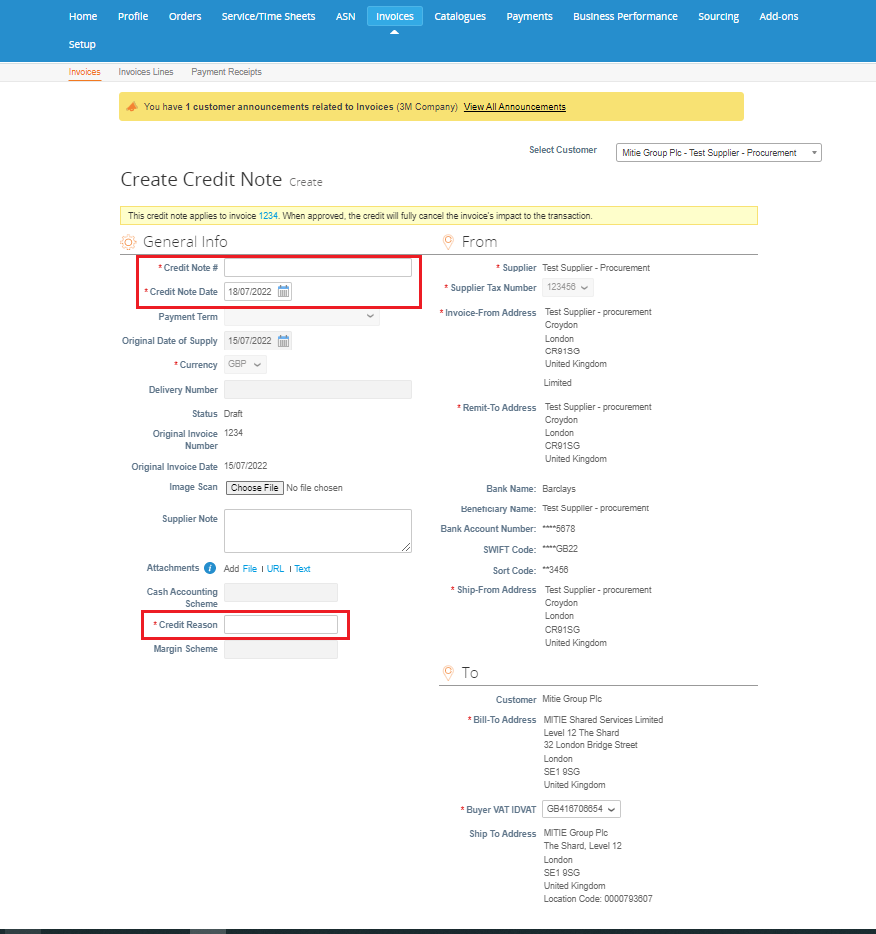
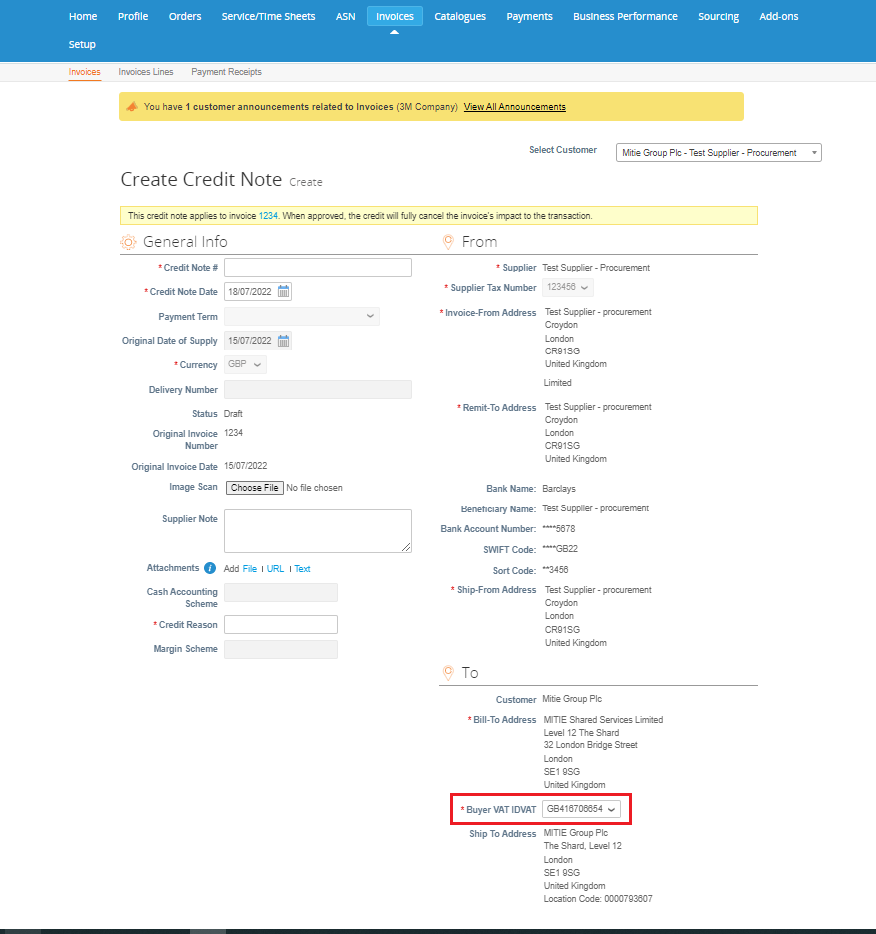
Complete the ‘To’ section.
- Buyer VAT IDVAT – Ensure Buyer VAT IDVAT is GB for UK.
Scroll down and complete the ‘Lines’ section.
- The credit note has brought through lines from the invoice, and created a credit note
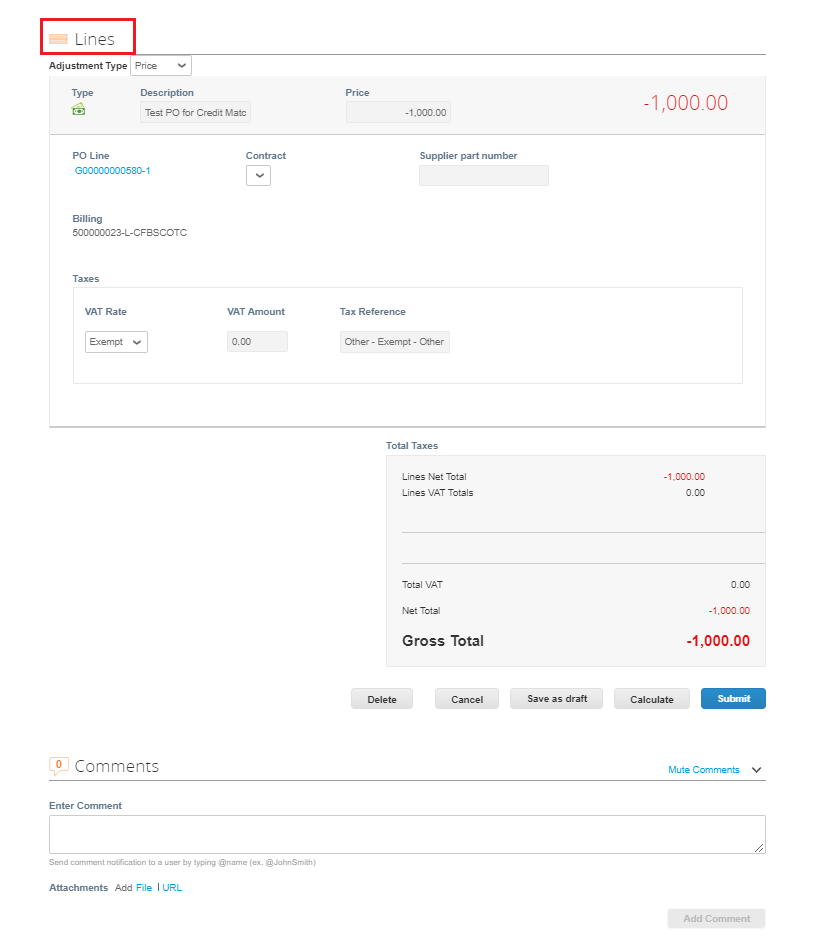
- Check the below details are correct:
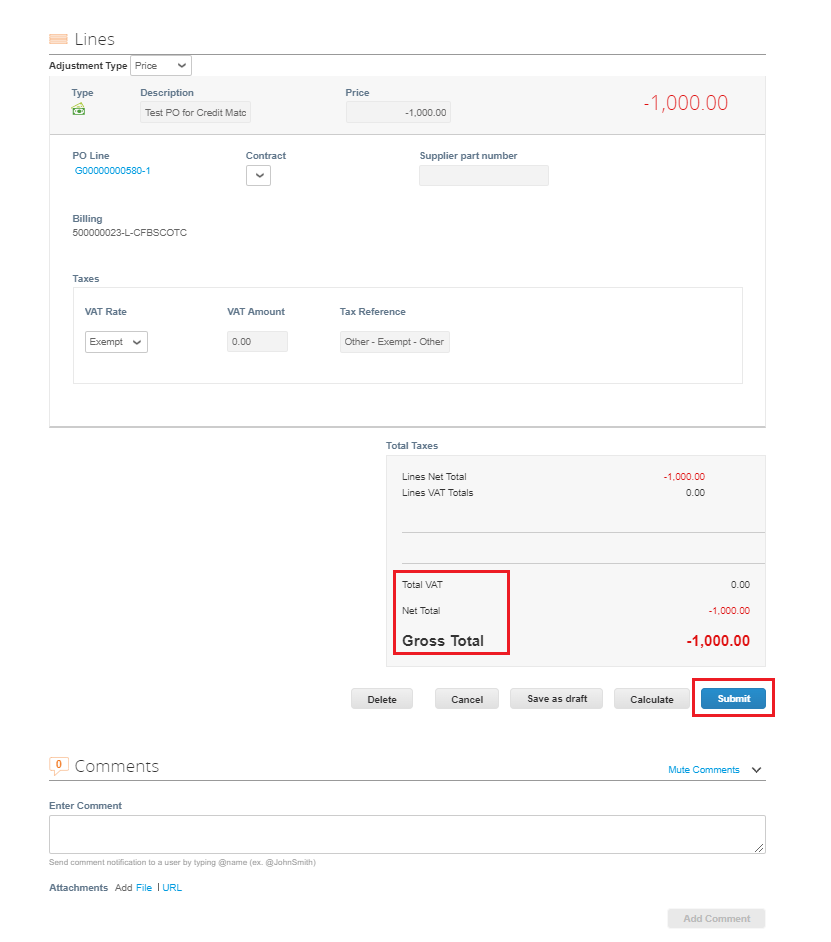
– Total VAT
– Net Total
– Gross Total
- If all is correct, click ‘Submit’
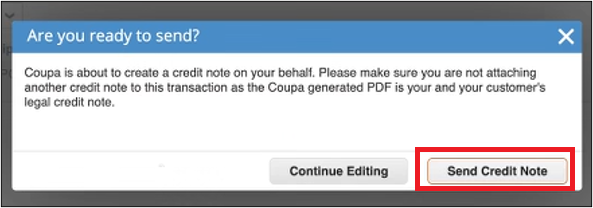
The ‘ Are you ready to send?’ window will pop up.
- If you are happy to continue, click ‘Send Credit Note’.
The Create Replacement Invoice window will pop up.
- If you click ‘Yes’ you will be taken to the invoice creation screen.
- Instructions on How to Create & Submit an Invoice in your CSP.
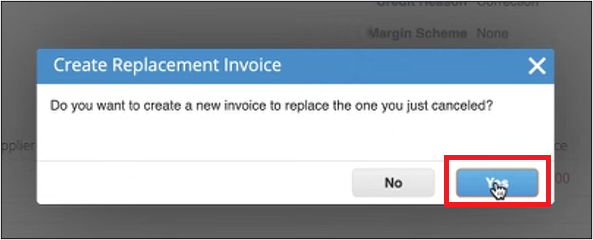
- If you click ‘No’ you are taken back to the ‘Invoices’ screen.
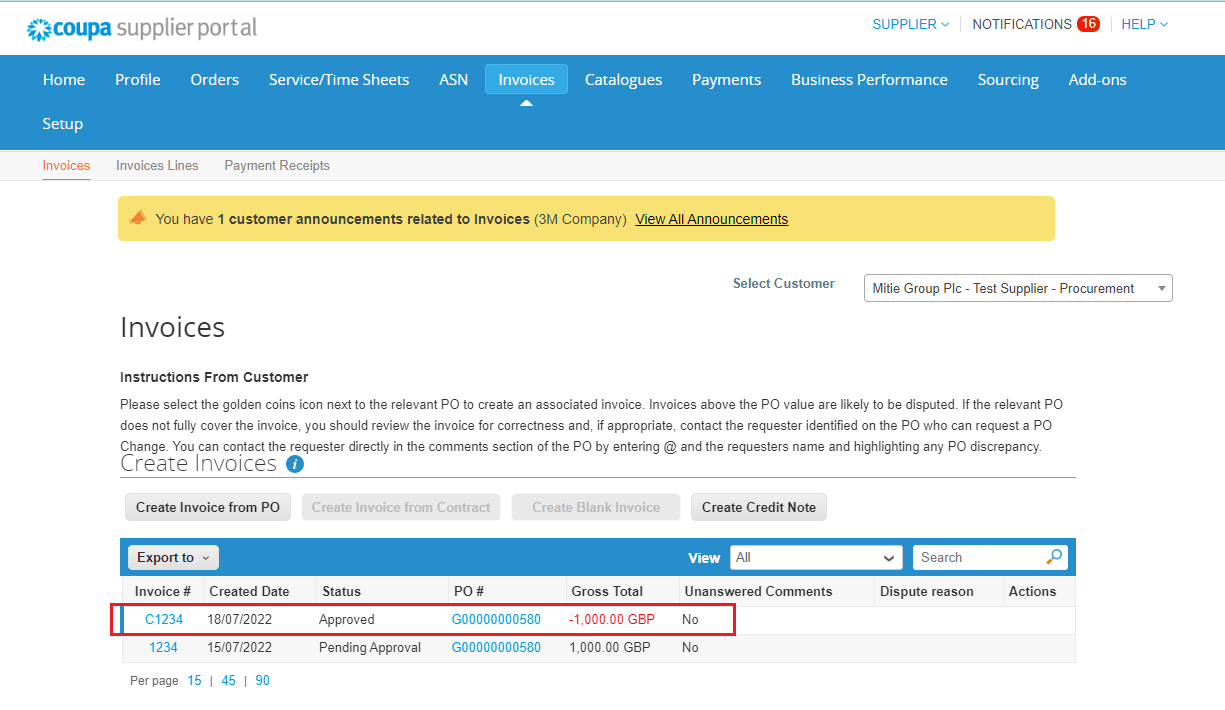
- You will see that the credit note that you have just created appears at the top of the list.
Milestone reached!
You can now Create & Send a Credit Note in CSP.
