How to Create and Submit an Invoice in CSP
Coupa Supplier Portal (‘CSP’)
Coupa is Mitie’s new Source to Pay (S2P) system has changed the way we do business with all our suppliers, making it more efficient and effective, bringing in simpler invoicing and better visibility of payments.
As part of this we will be introducing a new way for you to submit and managing your invoices.
No PO, No Pay: Invoices can be raised only against a purchase order, so you’ll need to have your POs set up first by your Mitie Contact. The PO’s will be directly transmitted onto the portal. They will also arrive in the nominated PO mailbox which you have set to receive the PO’s.
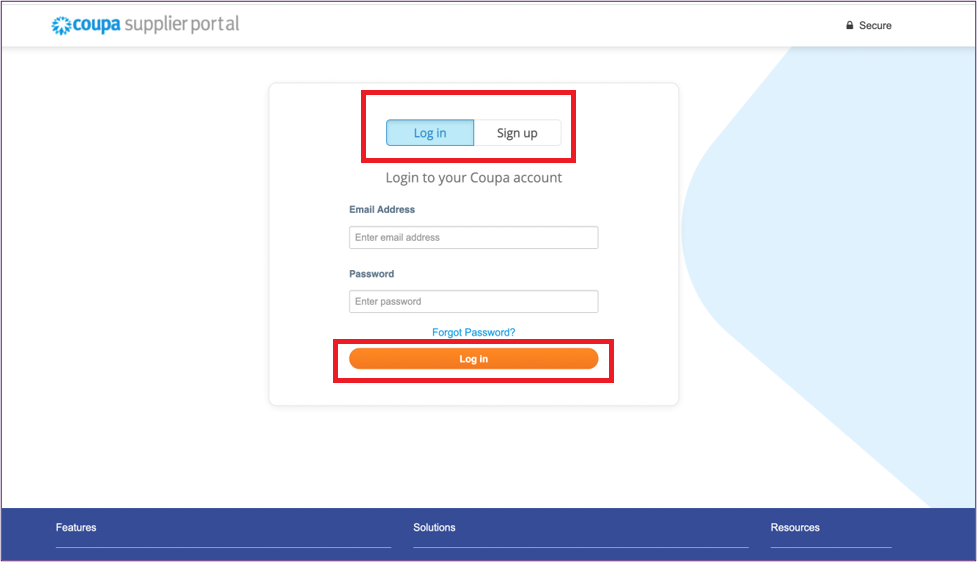
Follow the link to login to the Coupa Supplier Portal(CSP)
- Log in onto the CSP using this URL https://supplier.coupahost.com/sessions/new.
Note:
* Add this URL to your Favourites bar for future reference.
Find your Purchase Order
Once you have received a Purchase Order (PO), and delivered the goods or service, you will want to submit an invoice to Mitie. Please follow the coming instructions.
- Select Orders in the menu from the blue bar on top of the window.
- Click Orders, to find the Purchase Orders that have been sent to your organisation from Mitie.

Note:
* Please use Select Customer – Mitie Group Plc. on the right corner of the screen, to see all the Purchase Orders from Mitie.
Comments
- You can use the ‘Comments’ section in Coupa, these can be found at the bottom of the PO and Invoices in your CSP.

- Please use the ‘@’ function to select the person you want to make a comments too, once you have selected there name you can type the message to them and then click the relevant add comment box. This will send a notification in Coupa to that person.

Create Invoice
- To create an invoice, click the gold coins to be found under ‘Actions’.

Note:
* It may take a few seconds to load the next screen.
* Make sure you have your invoice details to hand as you be required to enter them during the following steps.
* You must NOT use the red coins to create credit notes. Please refer to the Mitie training document on ‘How to create and submit Coupa credit notes’
The ‘Choose Invoicing Details’ window will pop up
- Select the correct ‘*Legal Entity’.
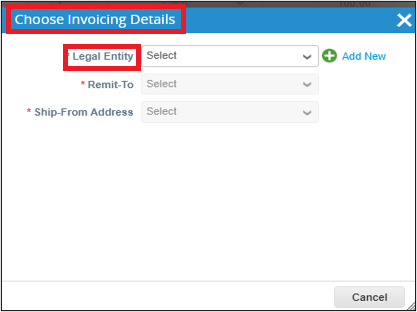
- Verify that the ‘Invoice from’ details are correct.
- Select the correct ‘*Remit-To’ & ‘*Ship-From Address’.
- Click ‘Save’.
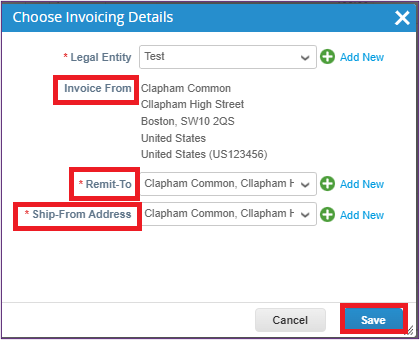
The Create Invoice screen will display

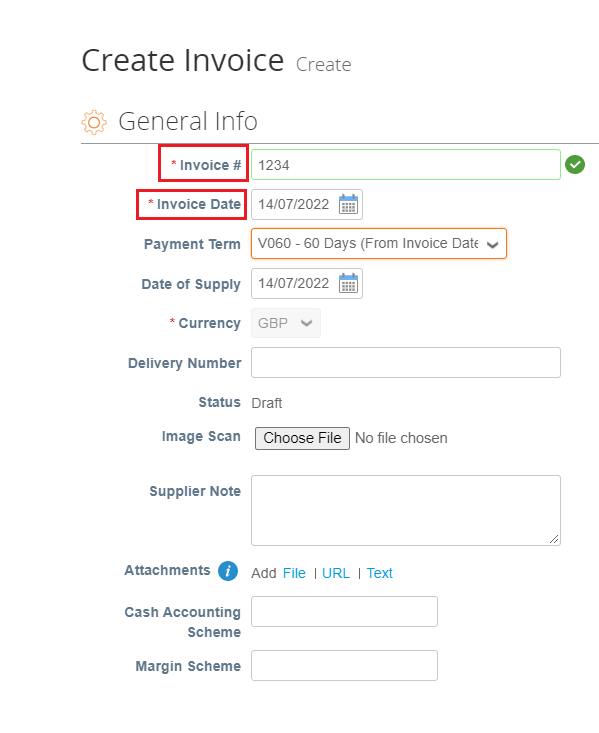
Complete the ‘General Info’ section
- *Invoice # – enter the invoice number from your ERP system.
- *Invoice Date – must be the same as your invoice date otherwise it could affect your payment terms if it’s not changed.
Note:
* You can but are not required to add a copy of your invoice as an attachment.
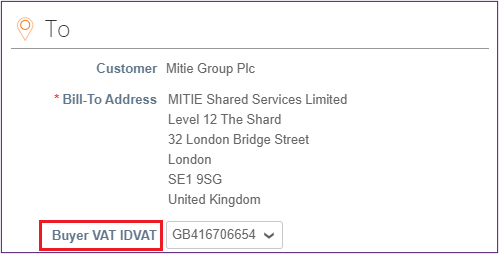
Complete the ‘To’ section
- Buyer VAT IDVAT – Ensure Buyer VAT IDVAT is GB for UK.
Complete the ‘Lines’ section
Your Purchase Order will either be based on either Amount or Quantity.
- Amount
Usually used for POs relating to services. More that one invoice can be submitted against an amount based Purchase Order. As you may need to submit more than one invoice you will find that the price can be changed according to the value of the invoice that you wish to submit.

Or
- Quantity
Usually used for POs relating to goods. A Single invoice may be submitted against such purchase orders and the Qty field cannot be changed

Note:
* If you find you are not able to invoice against the PO (i.e. due to a QTY PO being issued and not able to change the price) you must contact your Mitie requester by adding a comment against the PO asking them to cancel the PO and re-raise an AMT based PO. You are unable to create an invoice with a greater value than the PO.
Multiple Lines PO
- If you have multiple lines on a PO, you are able to adjust the Amount price against each line. You may also remove the lines that you do not wish to invoice against this time by clicking the ⊗.

CIS Invoices
- CIS is Construction Industry Scheme each supplier must select if their invoice is in scope or out of scope.
- CIS invoices can be submitted by the CSP. It is the responsibility of the supplier to indicate the labour cost of the service they provide and indicate the tax treatment.
- Submission warnings will guide the supplier to ensure they provide the correct information on the invoice.

Note: CIS gross status suppliers supplying materials only, select CIS related cost to In Scope, set “0 pence” Labour and use Reverse Charge (Tax) to ensure the invoice is automatically processed
Taxes – 0%, Exempt and Reverse Charge
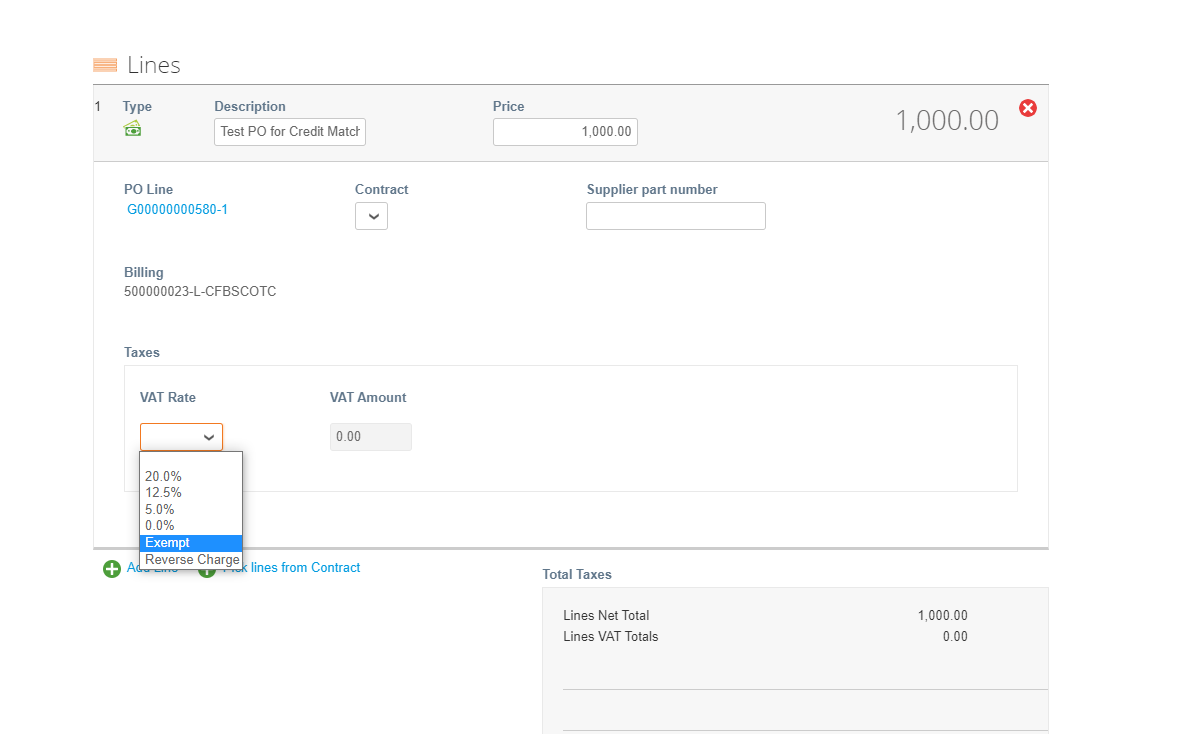
In the VAT drop down select the relevant VAT – Options depending on Country, UK are 20%, 12.5%, 5.0%, 0.0% Exempt and Reverse Charge
Tax 0%?
- The tax reference can be left blank

Tax Exempt?
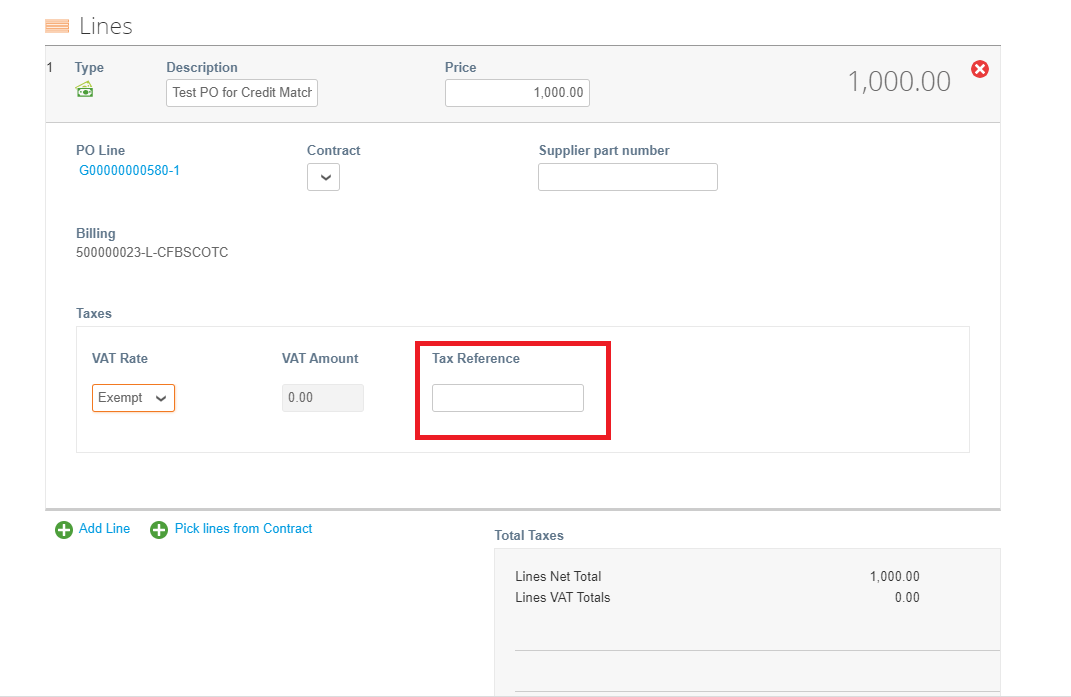
- If you select an ‘Exempt’ tax rate, a reference box is displayed.
- In the Tax Reference box start typing exempt and it will start to show exception options from which you can make a selection.

Reverse Charge?
- In the Tax Reference type ‘C’ and select an option

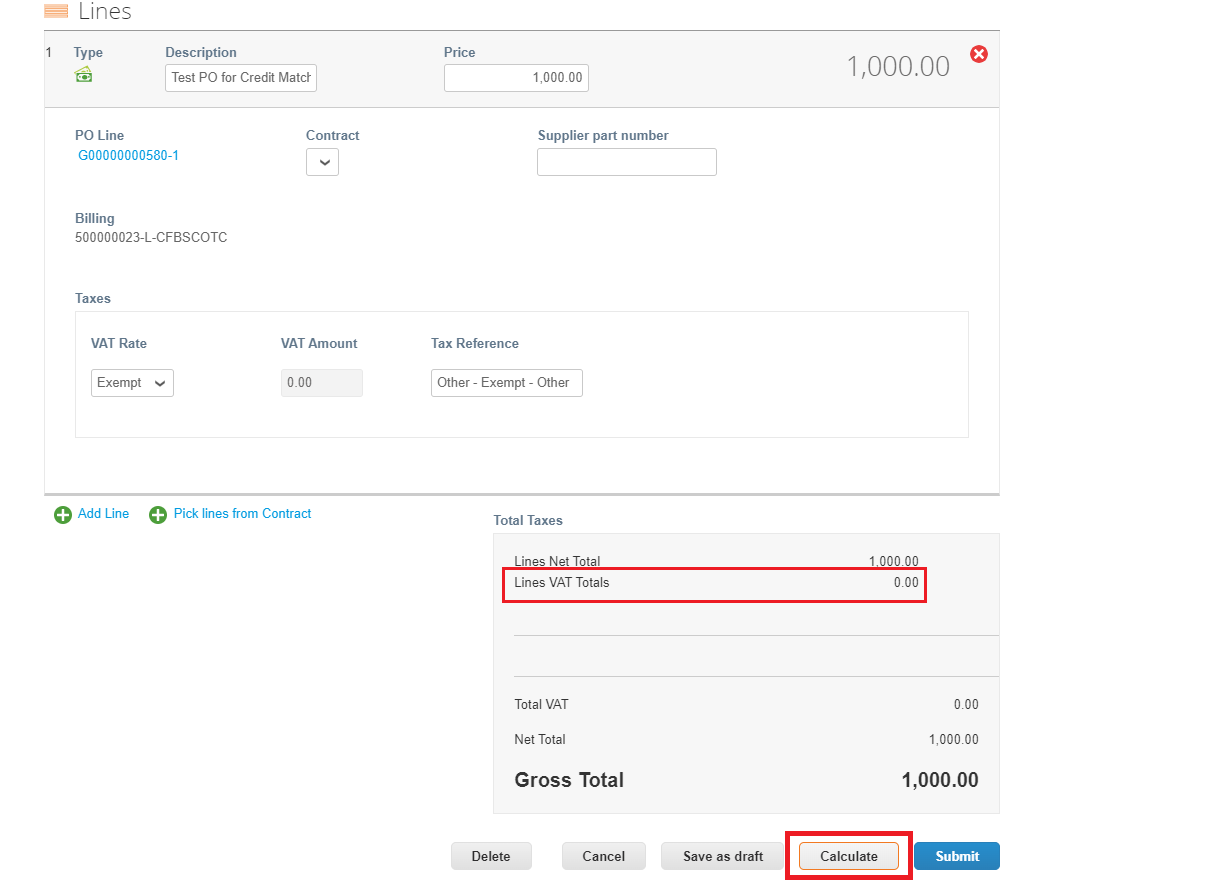
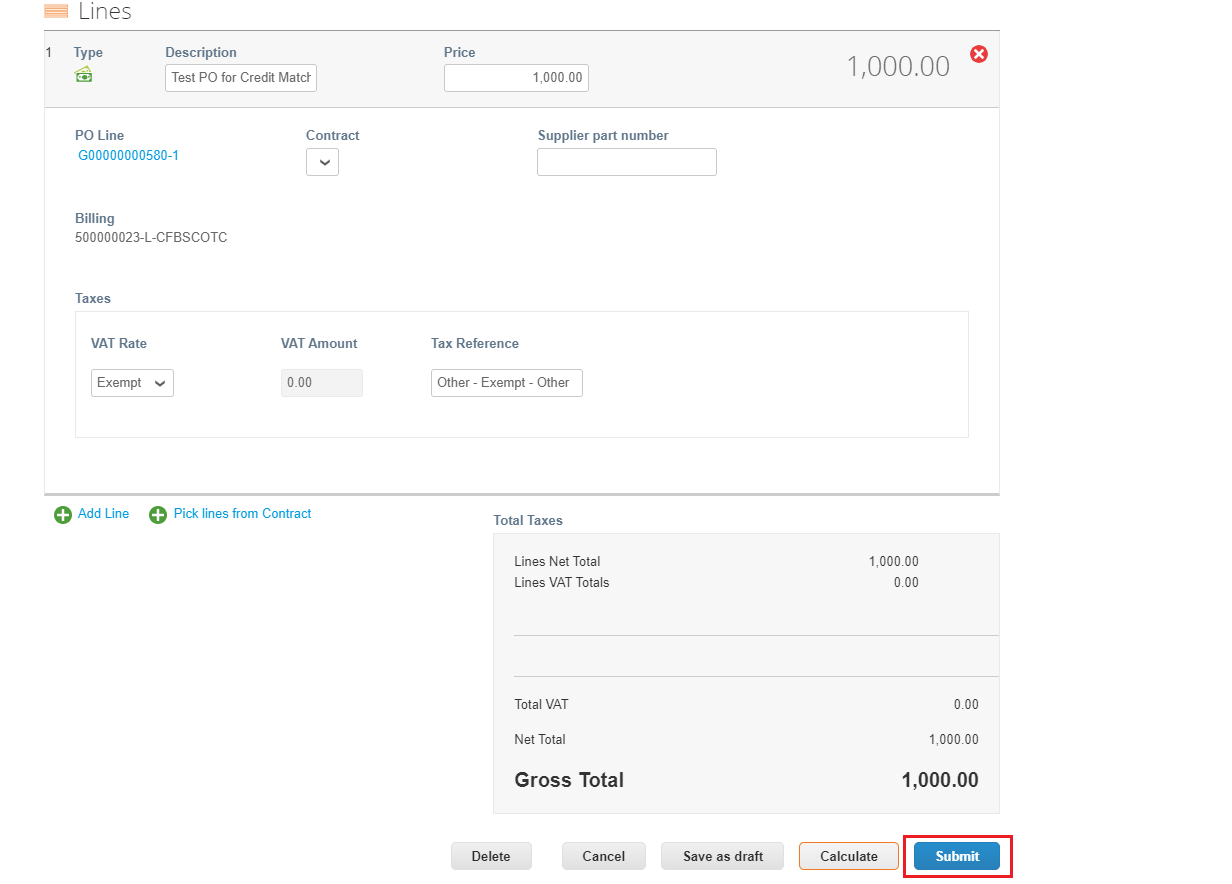
- Click ‘Calculate’ and you will see that the Tax total align with the VAT status that you selected.
Note:
* You can only have one VAT rate per line (if PO is one line, you can only PO flip one invoice line, if you invoice 2 VAT rates you need 2 lines on the PO)
* Always click calculate to check the invoice values as expected before you submit as mistakes cannot be changed without a credit note and re-invoice.
Submit Invoice
- Review the invoice that you have created and the entries that you have made. If this aligns with the invoice in your ERP system click ‘Submit’.
Send Invoice
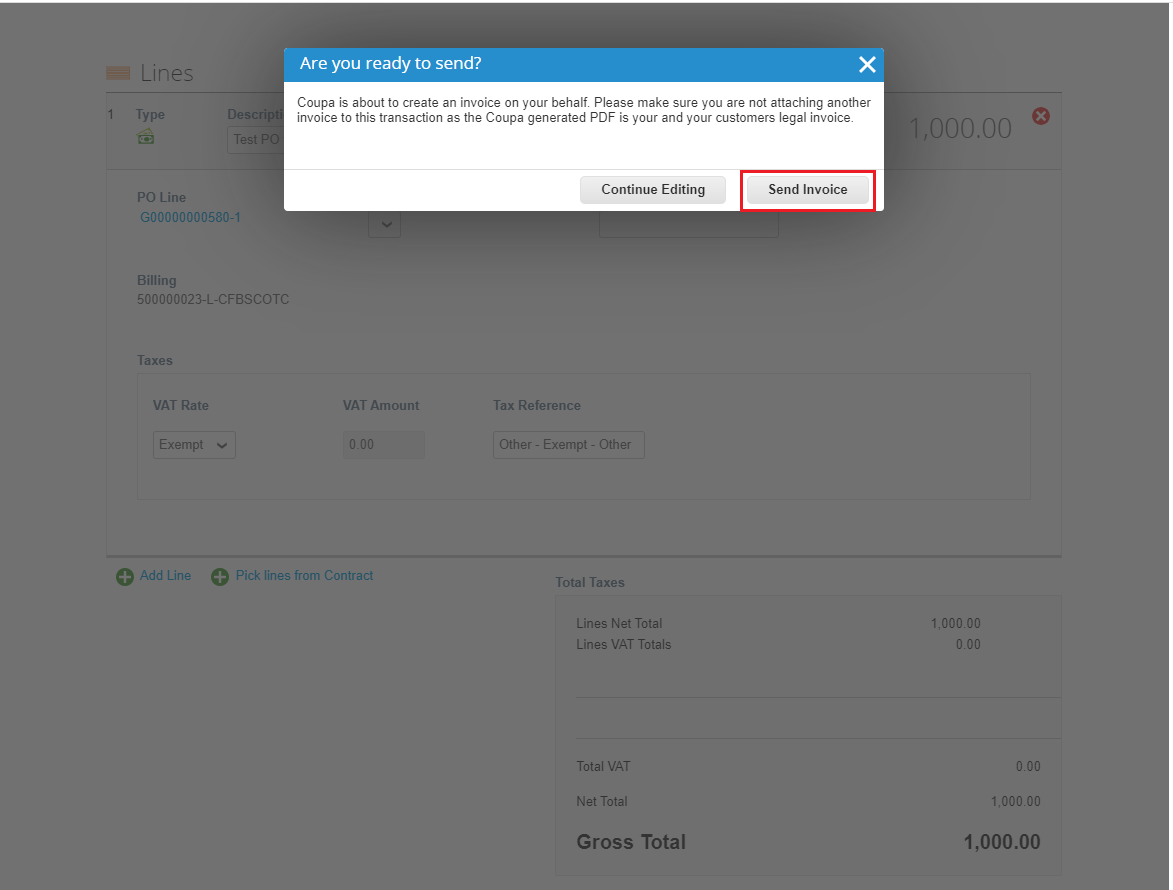
‘Are you ready to send?’ window will pop up.
- To make any final amendments click ‘Continue Editing’
- Click ‘Send Invoice’.
Milestone reached!
You can now Create & Send Invoice in CSP.
