How to use the Subcontractor Portal – Job Management

How to reject a job on the Subcontractor Portal.
This section will help you to reject a job that was assigned to you on the Subcontractor Portal.
-
Click the icon next to Assignment Status.
(Note: A new pop-up window will open.)

-
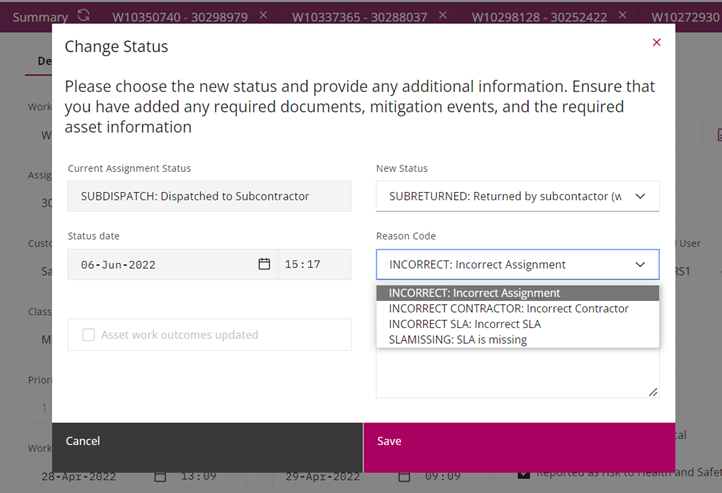
Choose the ‘New Status: SUBRETURNED: Returned by subcontractor (wrong trade etc)’.

-
Choose the ‘Reason Code’ from the Drop-Down Options
-
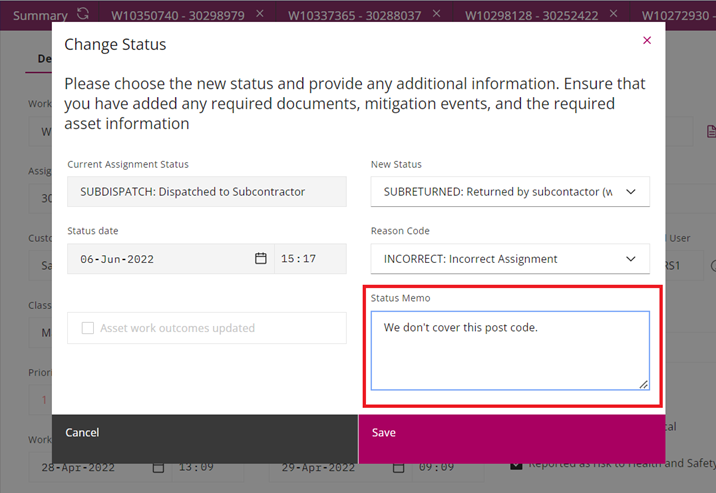
In ‘Status Memo’ explain why the job is rejected.
Watch a video on how to reject a Job on the Subcontractor Portal

How to accept a job on the Subcontractor Portal.
This section will help you to accept a job that was assigned to you on the Subcontractor Portal.
-
Click the icon next to Assignment Status.
(Note: A new pop-up window will open.)

-
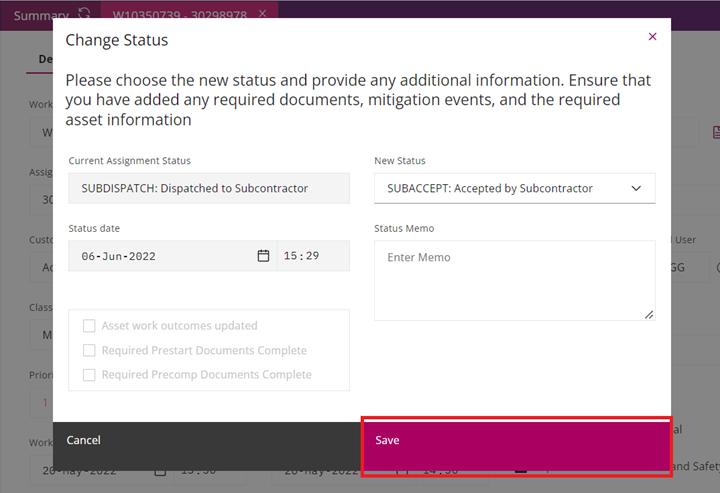
Choose the ‘New Status: SUBACCEPT: Accepted by Subcontractor’.

-
In ‘Status Memo’ add any relevant notes.
(Note: This step is optional.)

-
Click ‘Save’.
(Note: The Assignment Status will change in SUBPREDOCS: Awaiting Pre-Start Documents from Subcontractor.)
Watch a video on how to accept a Job on the Subcontractor Portal

How to provide an ETA.
This section will help you to provide an ETA for a job.
-
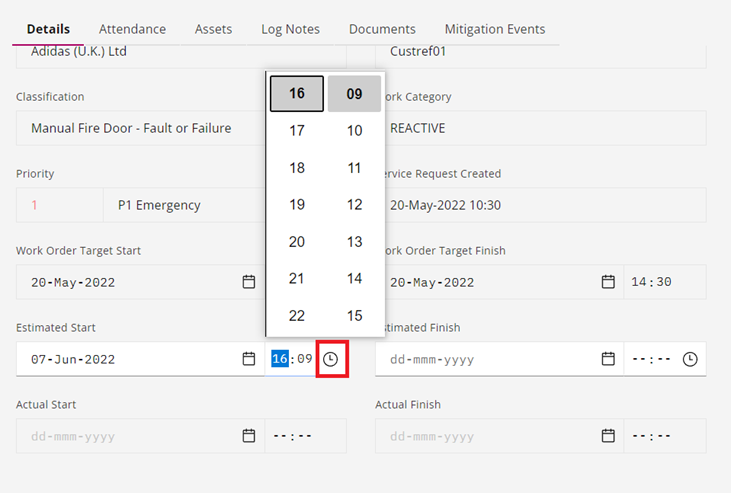
Go to ‘Estimated Start’ Section.

-
Click the calendar icon and choose the Date using the calendar.

-
Click the clock icon to select the time.
-
Click ‘Save Changes’ to save the ETA.

Watch a video on how to provide an ETA for a job.

How to add Log Notes.
This section will help you to add Log Notes.
-
Go to ‘Log Notes’ tab.
(Note: Here you can see Log Notes created by client, Mitie engineers, Mitie Supply Chain etc.)

-
Click ‘Add Log’.
(Note: A new pop-up window will open.)

-
In Summary add a brief note.
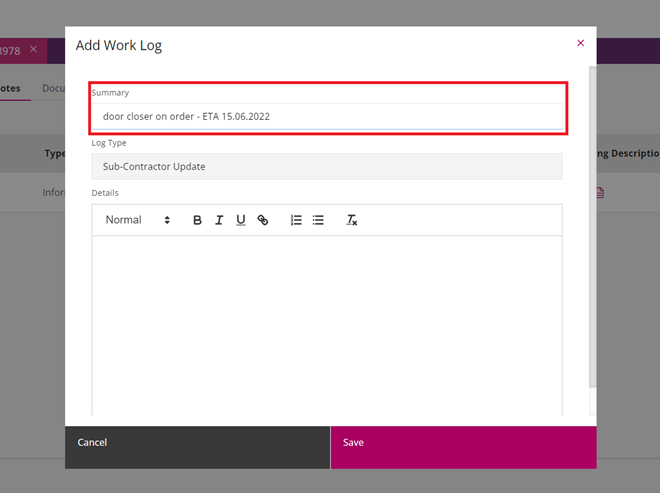
-
In Details box add any relevant notes related to your update.

-
Click ‘Save’.
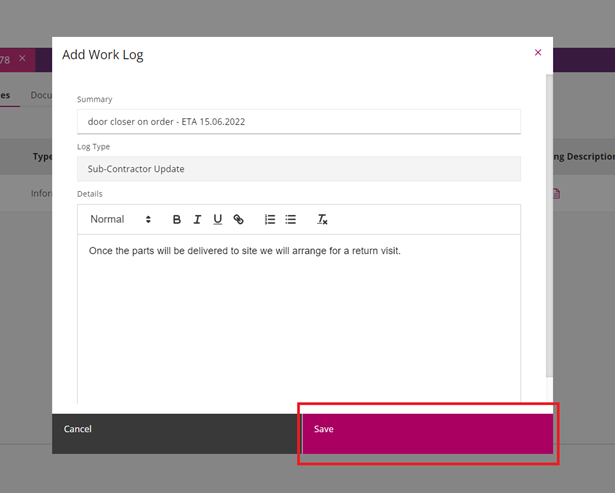
Watch a video on how to Log Notes.

How to add Mitigation Notes.
This section will help you to add Mitigation Notes.
-
Go to ‘Mitigation Events’ tab.

-
Click ‘Add Mitigation Event’.
(Note: A new pop-up window will open.)

-
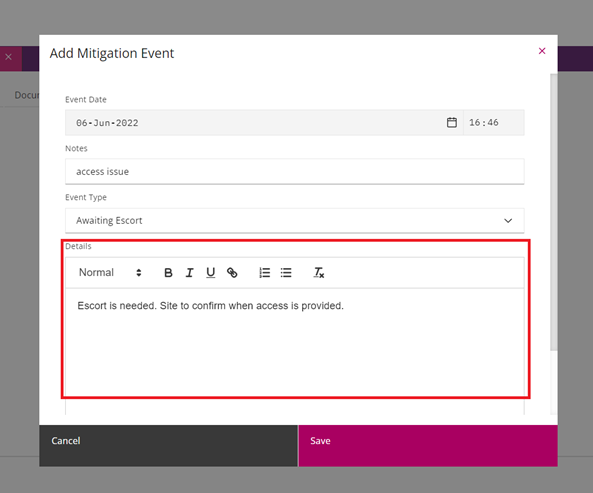
In Notes add a summary.
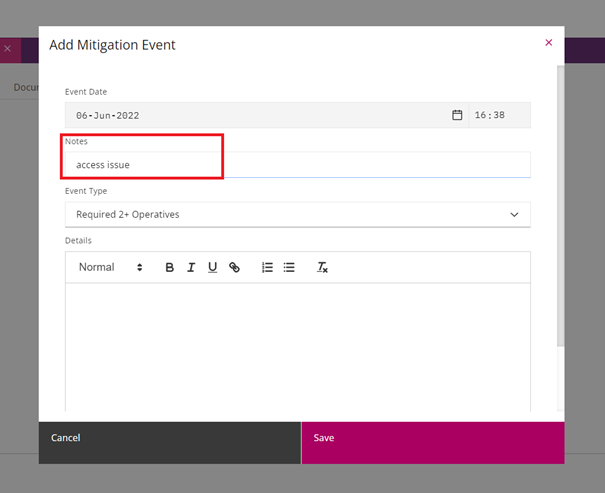
-
Select the relevant Event Type from the Drop-Down options.
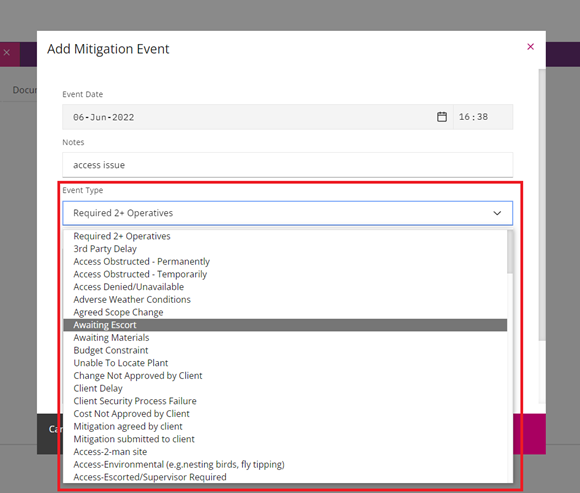
-
Add any additional information on Details box.
-
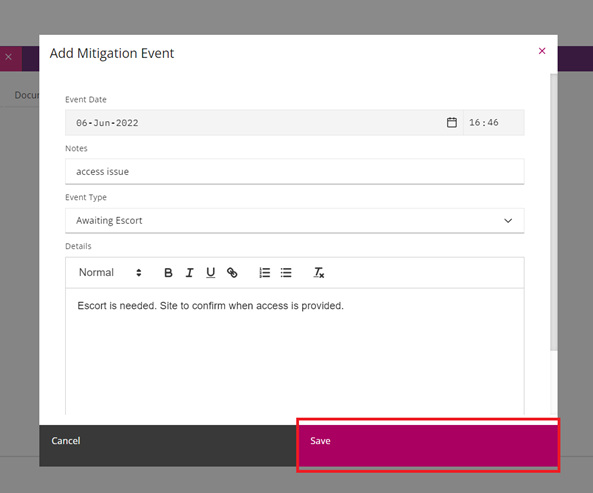
Click ‘Save’.
(Note: The Mitigation Event was created, and you can see it on the Subcontractor Portal.)
Watch a video on how to add Mitigation Notes.

How to upload prestart documents.
This section will help you to upload prestart documents.
-
Go to ‘Documents’ tab.

-
Click ‘Create’.
(Note: A new pop-up window will open.)

-
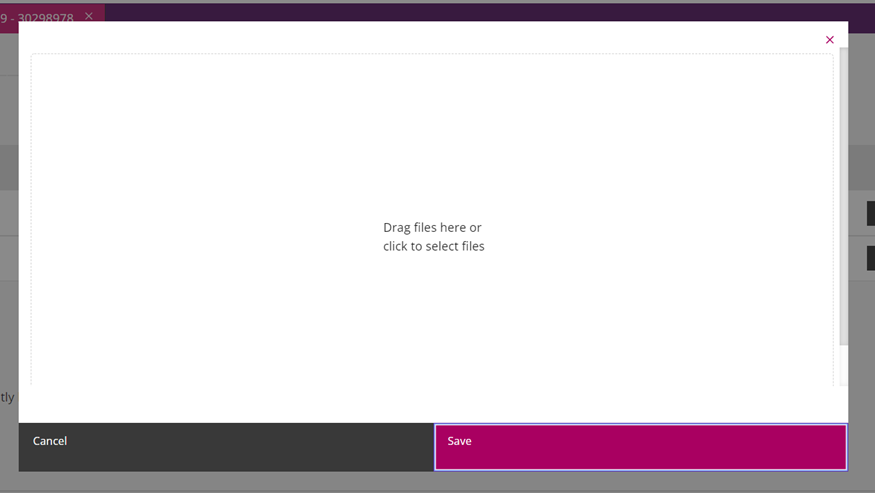
Click inside the white box.
-
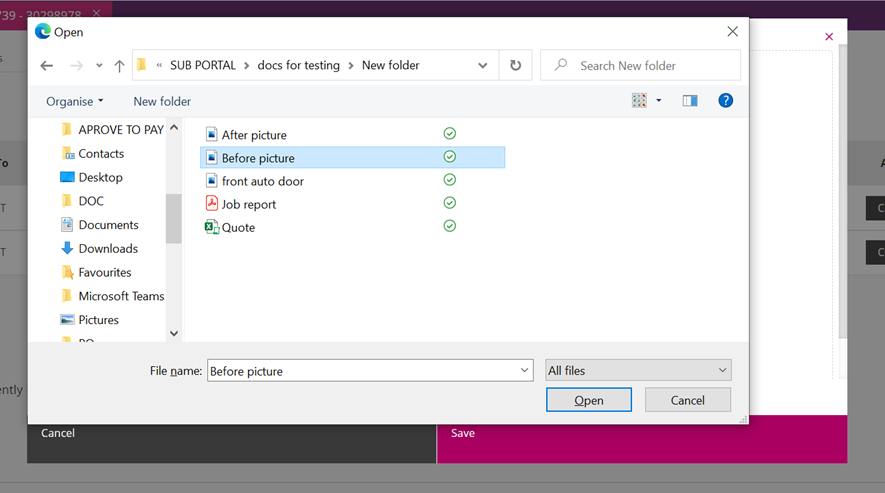
Select the file from your computer and click ‘Open’.
-
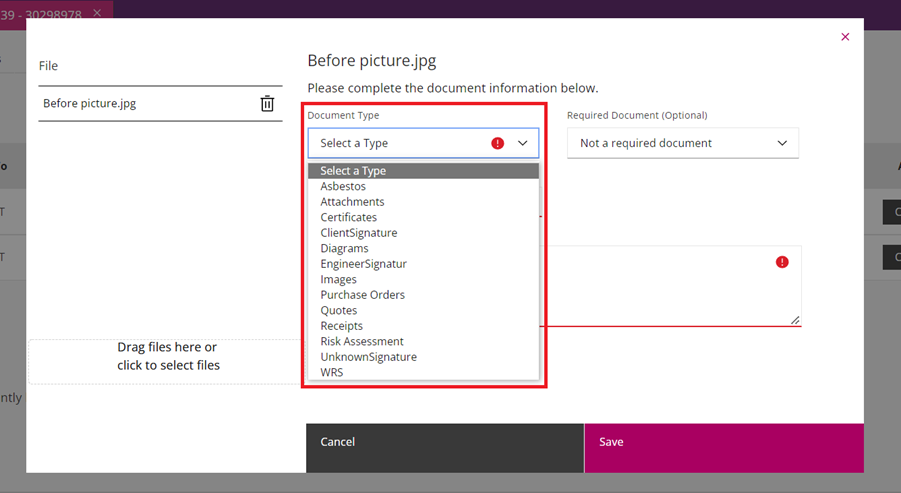
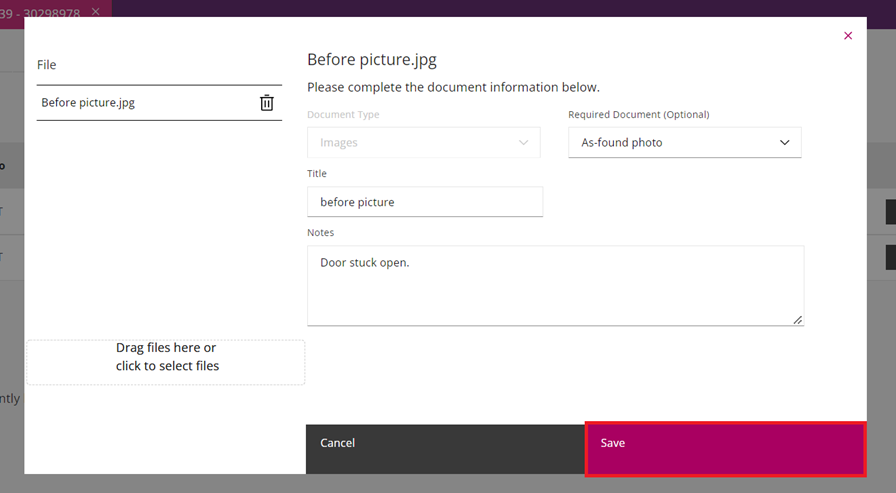
Select the Document Type from the drop-down options.
-
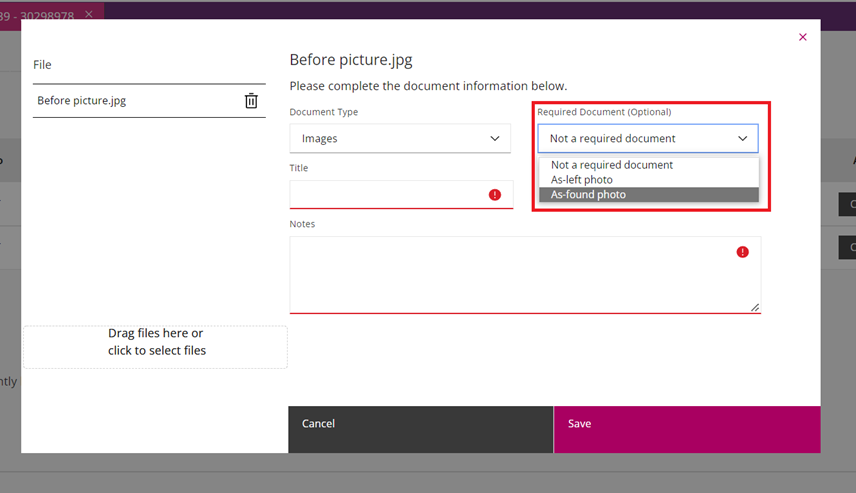
Select the requirement type from the drop-down options.
-
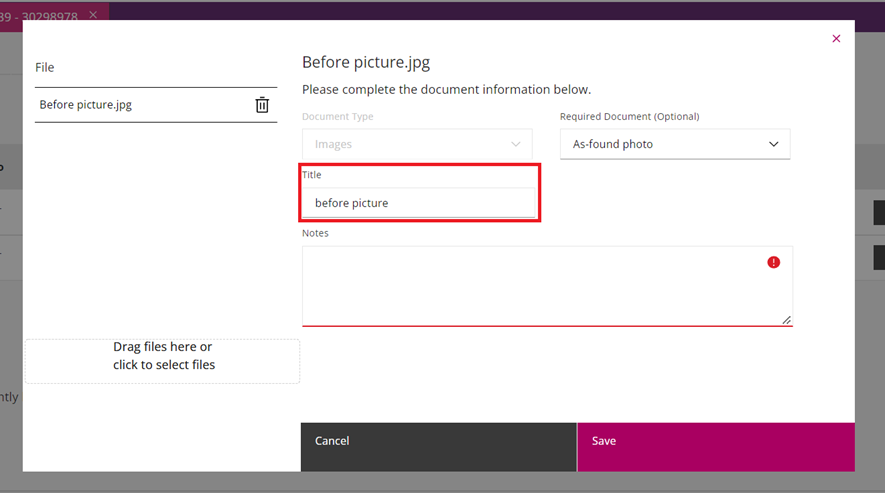
Add the document title.
-
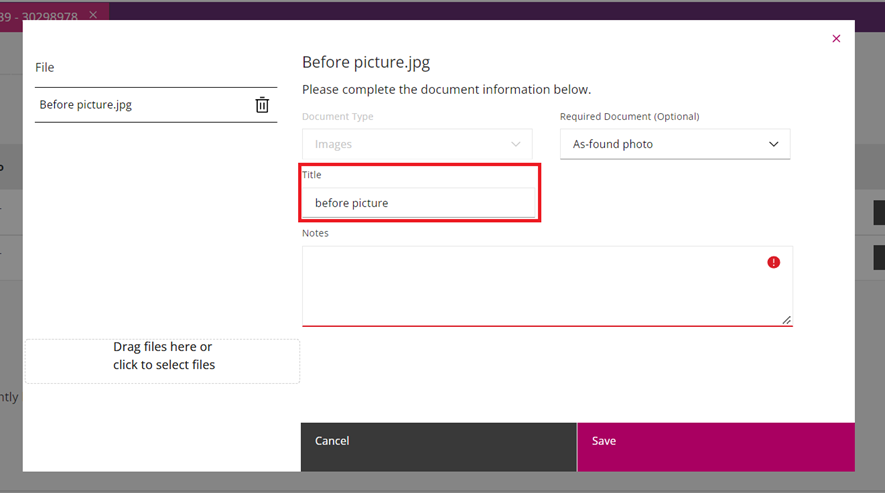
In Notes add a brief description related to your file.
-
Click ‘Save’.
(Note: Once the file is uploaded you can see the documents on the Subcontractor Portal. Here you can also see any documents provided by client or Mitie Supply Chain.)
Watch a video on how to upload prestart documents.

How to record Site Attendance.
This section will help you to record site attendance.
-
Go to ‘Attendance’ tab.

-
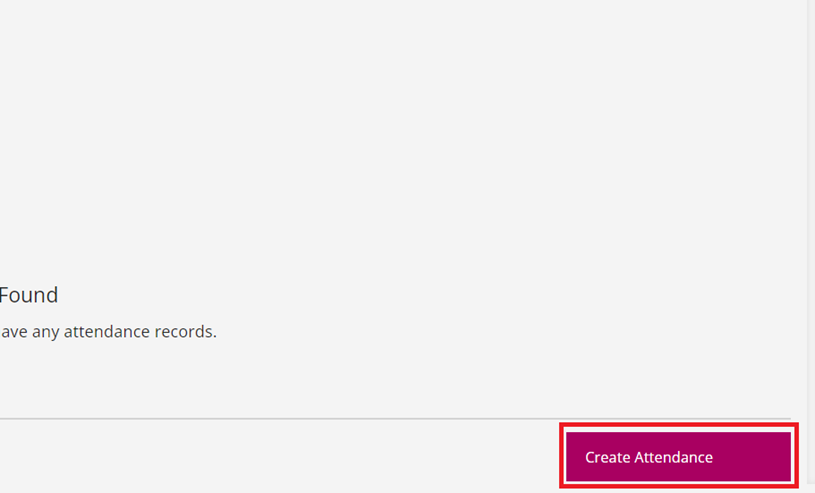
Click ‘Create Attendance’.
(Note: A new pop-up window will open.)
-
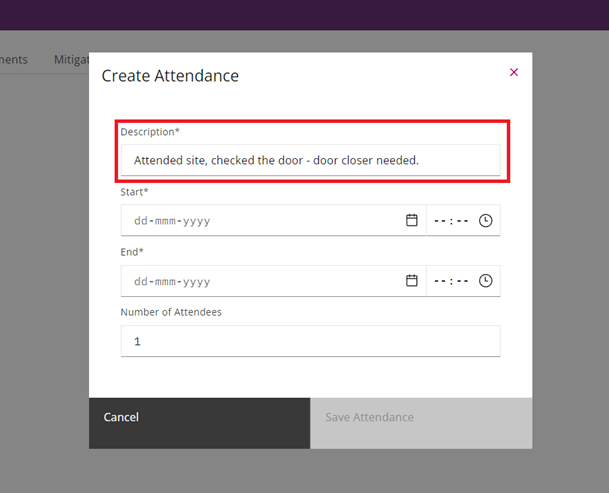
Add a brief description of your visit on site.
-
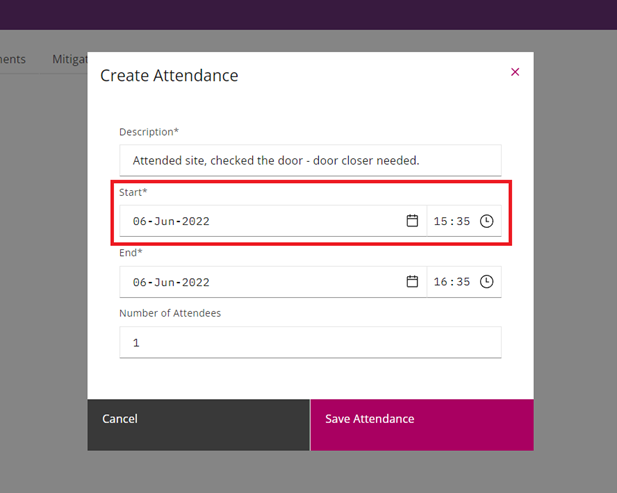
Select the start date and time using the calendar and clock icons.
-
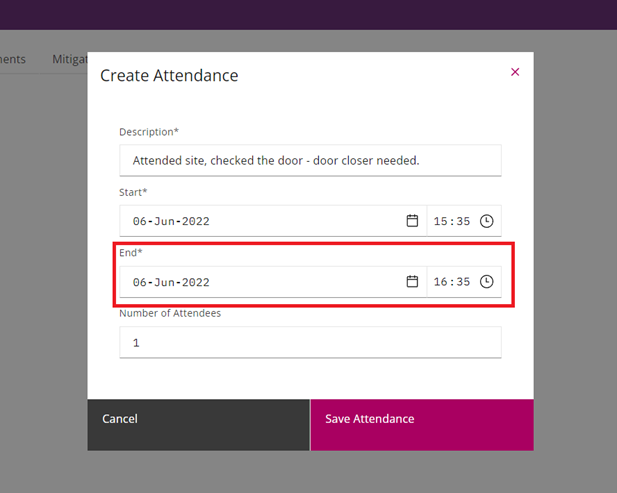
Select the end date and time using the calendar and clock icons.
-
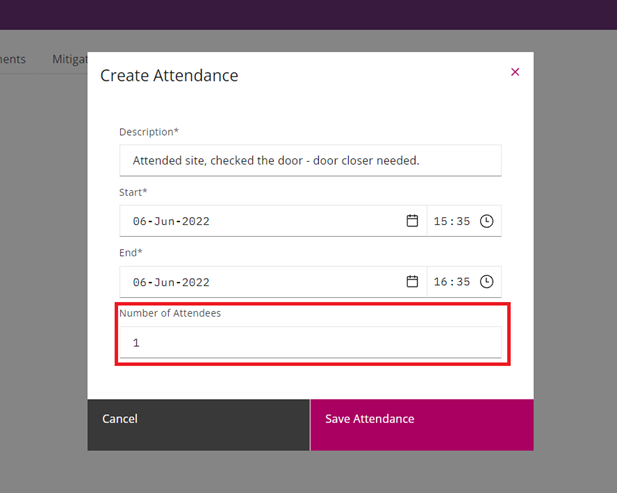
Select the Number of Attendees.
-
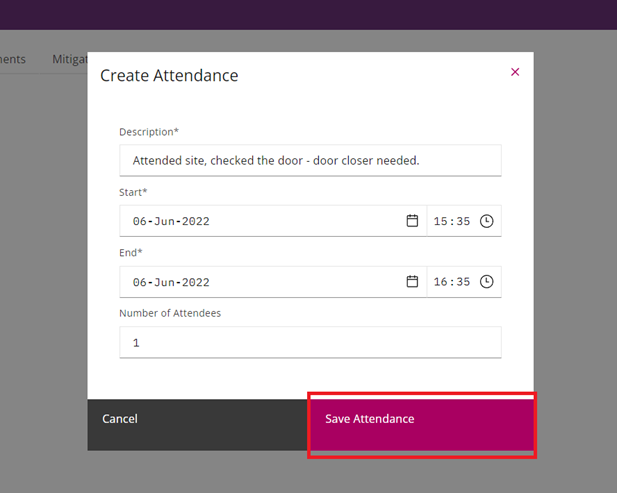
Click ‘Save Attendance’.
(Note: The Attendance was added successfully. Now this can be seen on the Subcontractor Portal. Please make sure you create a separate attendance for each visit on site.)
Watch a video on how to record a Site attendance.

How to move a job in progress
This section will help you to move a job in progress.
-
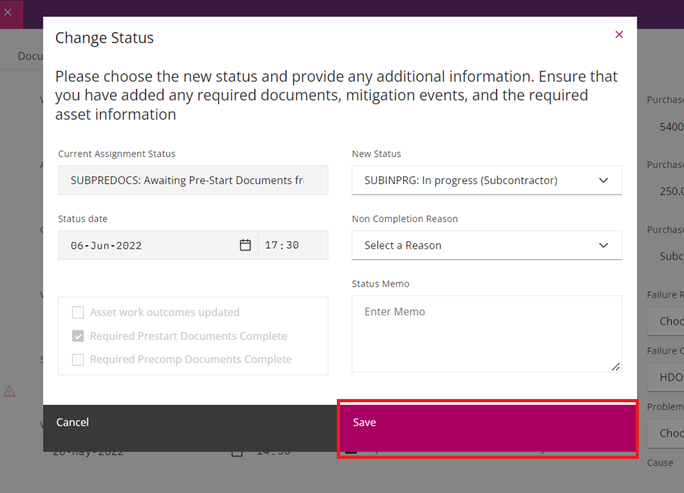
Click the icon next to Assignment Status.
(Note: A new pop-up window will open.)

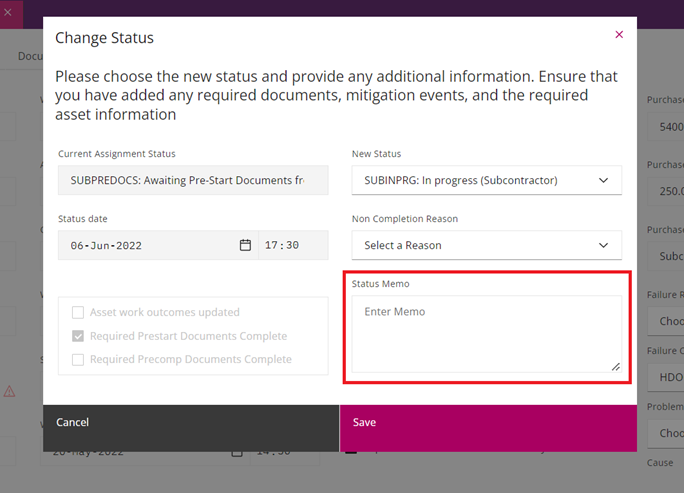
- In Status Memo add any relevant notes – this is optional.
(Note: As you can see the New Status is preselected as SUBINPRG: In Progress (Subcontractor).)
-
Click ‘Save’.
(Note: The New Assignment Status is now SUBINPRG: In Progress (Subcontractor).)
Watch a video on how to change status to ‘In Progress’.

How to request an uplift.
This section will help you to request an uplift.
-
Click the arrow icon next to Purchase Order Value.
(Note: A new pop-up window will open.)

-
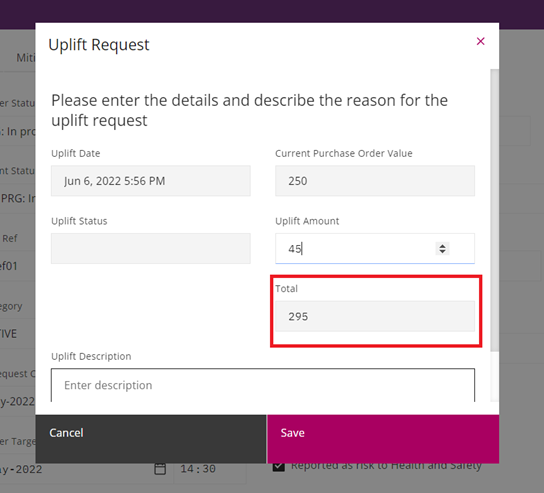
Add the ‘Uplift Amount’.

-
Check the ‘Total’ to be correct.
-
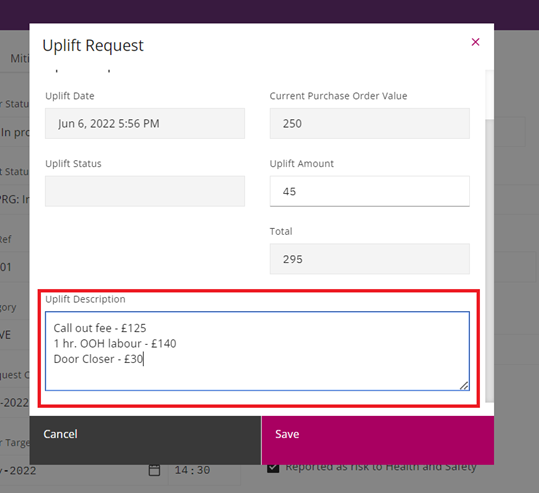
Add the ‘Uplift Description’.
-
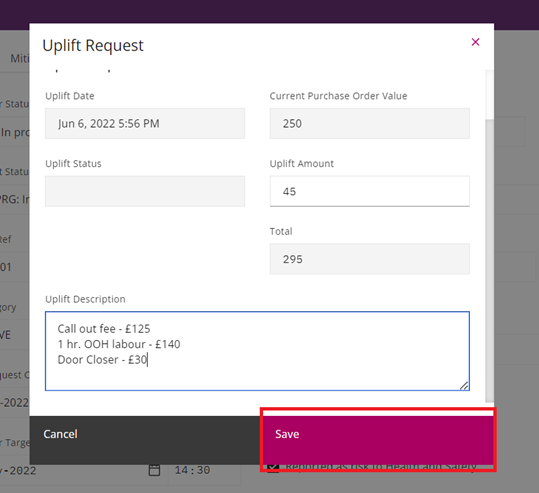
Click ‘Save’.
(Note: The uplift request has been sent to Mitie Supply Chain to be reviewed. The new Assignment Status is SUBUPLIFT: Awaiting uplift. If the cost is approved the Purchase Order Value will change.)
Watch a video on how to request an ‘Uplift’.

How to recall an uplift.
This section will help you to recall an uplift.
-
Click the arrow icon next to Purchase Order Value.
(Note: A new pop-up window will open.)

-
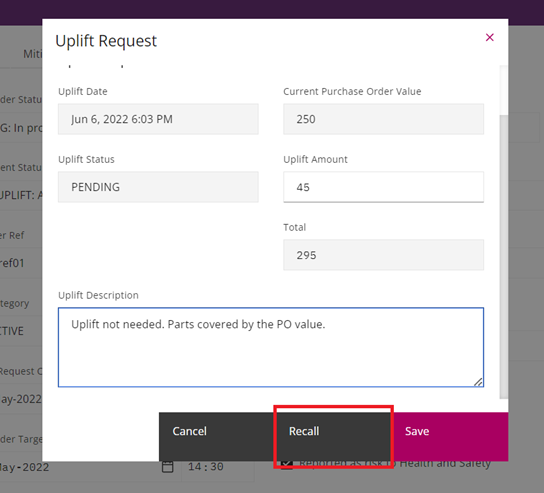
Change the ‘Uplift Description’ with a relevant recall comment.

-
Check ‘Recall’.
(Note: The Assignment Status will return to SUBINPRG: In progress (Subcontractor) and the Purchase Order Value will remain unchanged.)
Watch a video on how to recall an ‘Uplift’.

How to pass back a job.
This section will help you to pass back a job.
-
Click the icon next to Assignment Status.
(Note: A new pop-up window will open.)

-
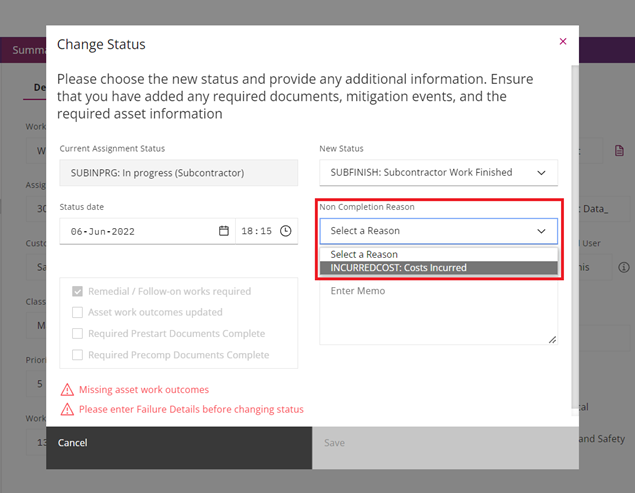
Select the relevant ‘Non-Completion Reason’.
(Note: The New Status is pre-selected as SUBFINISH: Subcontractor Work Finish.)
-
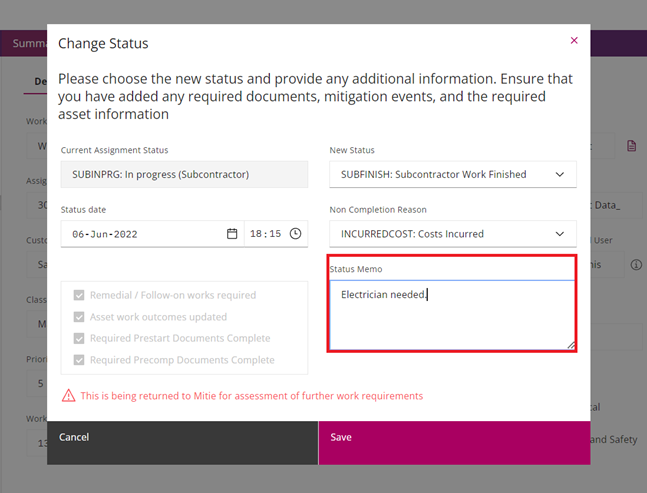
In ‘Status Memo’ box add more details on why the job is passed back to Mitie.
-
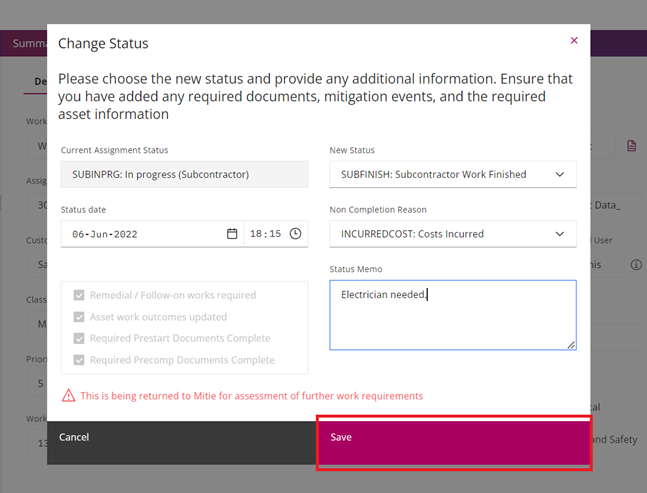
Click ‘Save’.
(Note: This is being returned to Mitie for assessment of further work requirements. The Assignment Status is now SUBENGCOMP: Awaiting recall period to end.)
Watch a video on how to pass back a job.

How to upload completion documents.
This section will help you to add completion documents.
.
-
Go to ‘Documents’ tab.
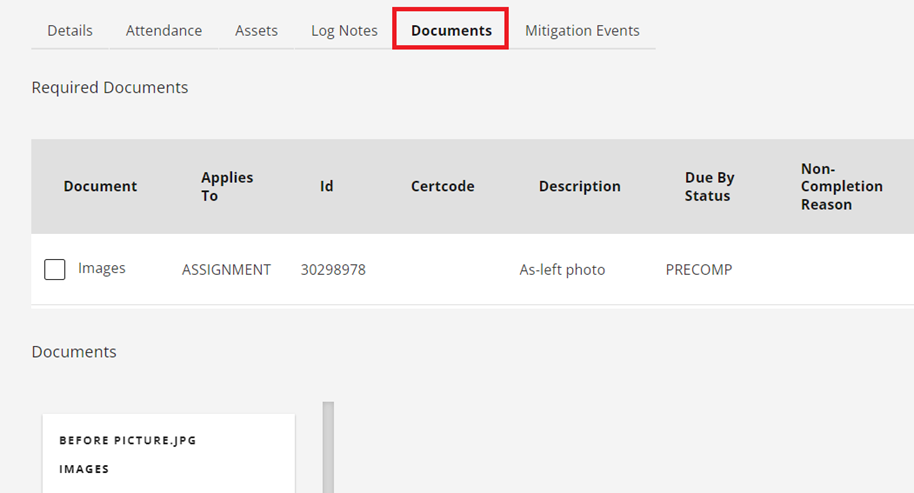
-
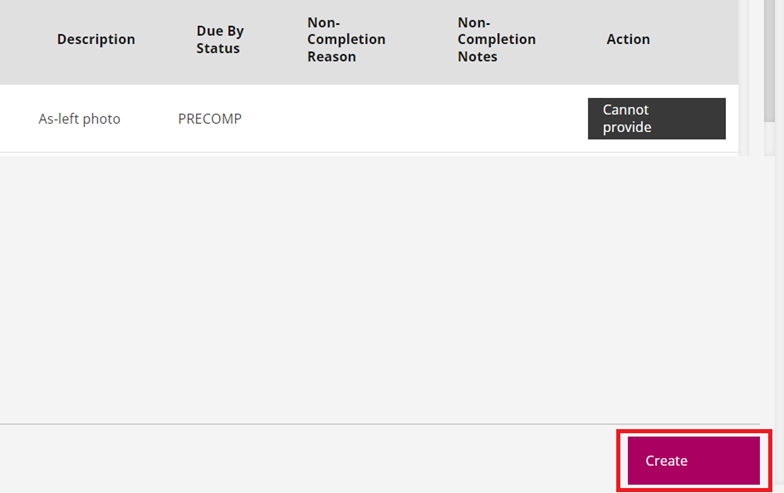
Click ‘Create’.
(Note: A new pop-up window will open.)
-
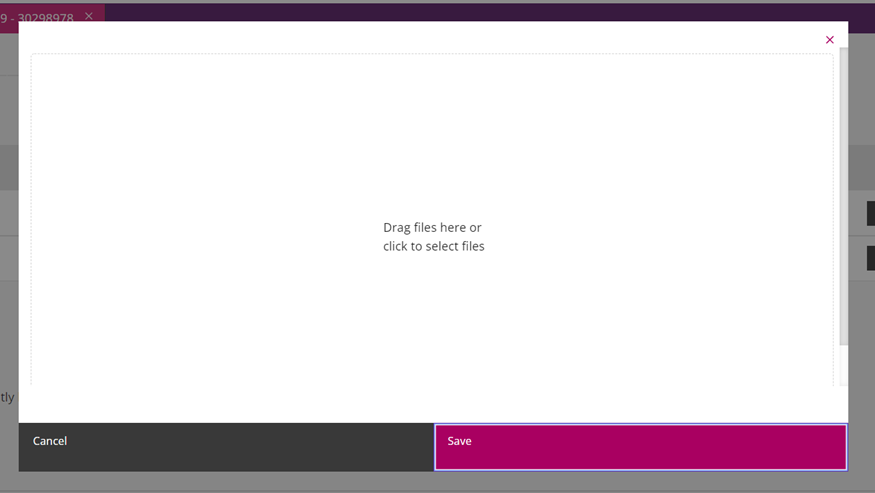
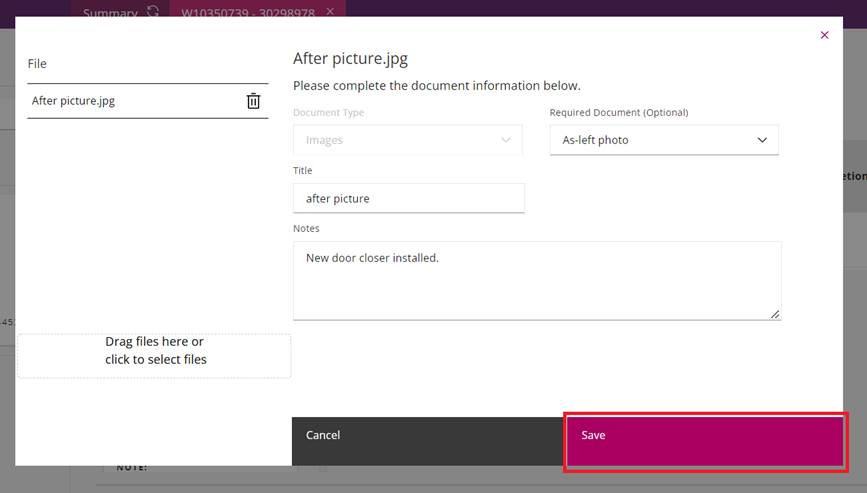
Click inside the white box.
-
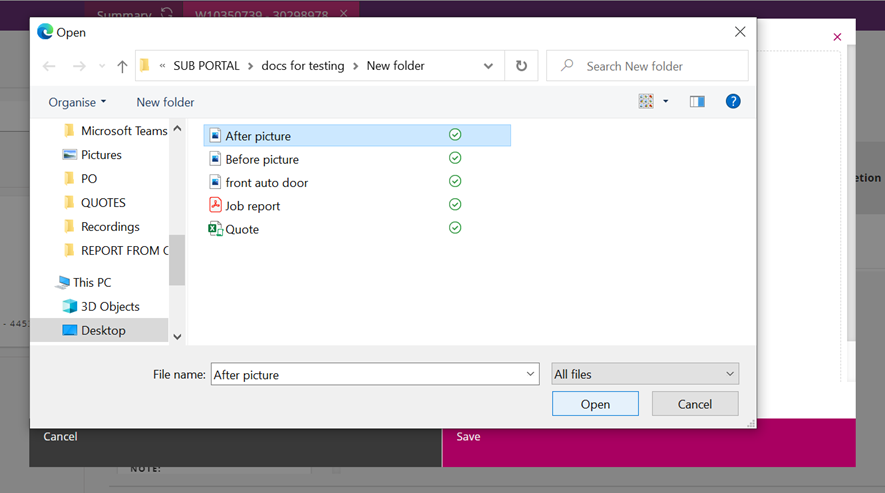
Select the file from your computer and click ‘Open’.
-
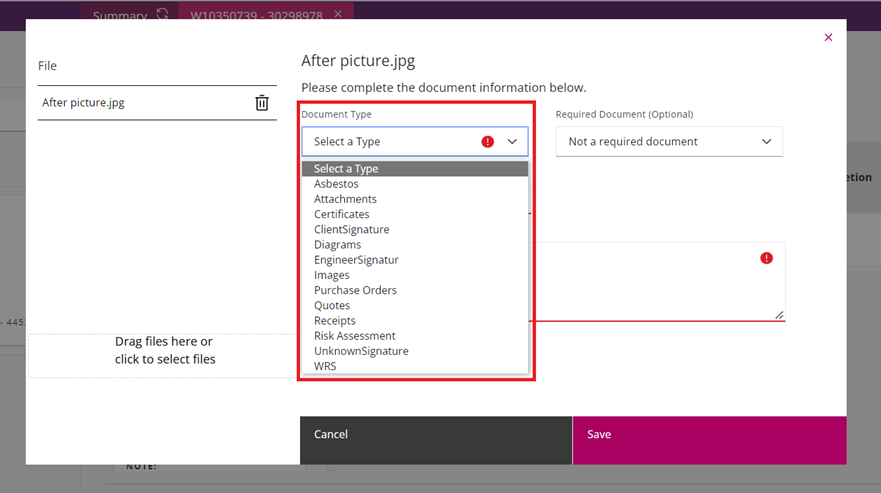
Select the ‘Document Type’ from the drop-down options.
-
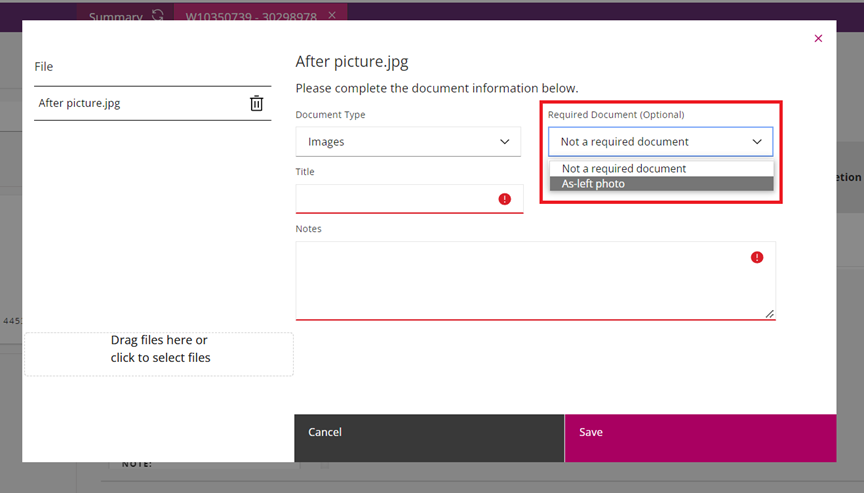
Select the ‘Required Document’ from the drop-down options.
-
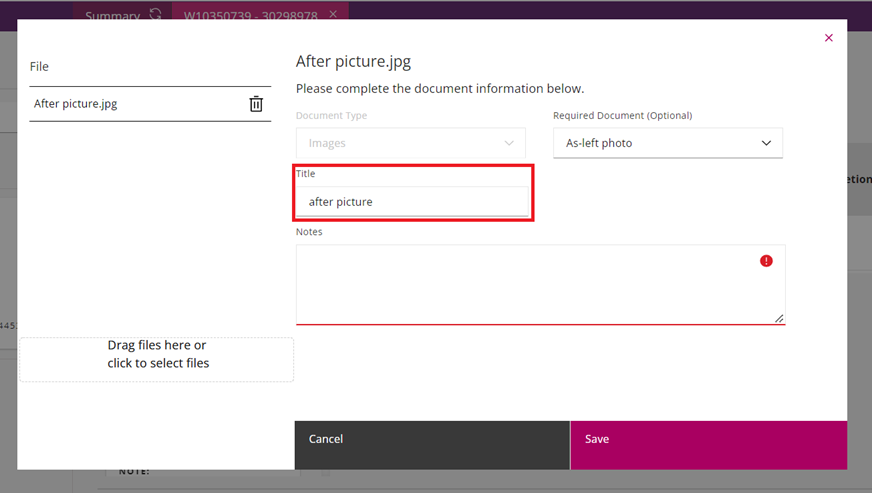
Add the document ‘Title’.
-
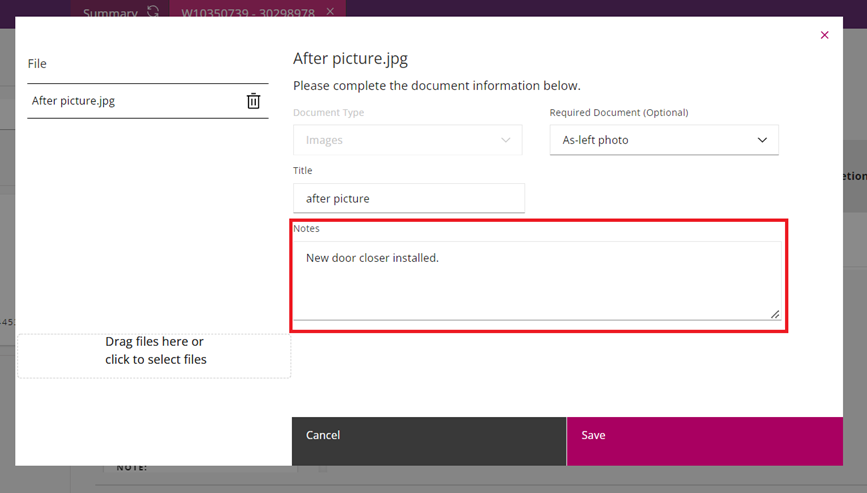
In ‘Notes’ add a brief description related to your file.
-
Click ‘Save’.
(Note: Once the file is uploaded you can see the documents on the Subcontractor Portal. Here you can also see any documents provided by client or Mitie Supply Chain.
Please repeat the process to add the Job report from your engineer, quotes and any other required documents.)
Watch a video on how to upload completion documents.

How to add asset updates.
This section will help you to add asset updates.
.
-
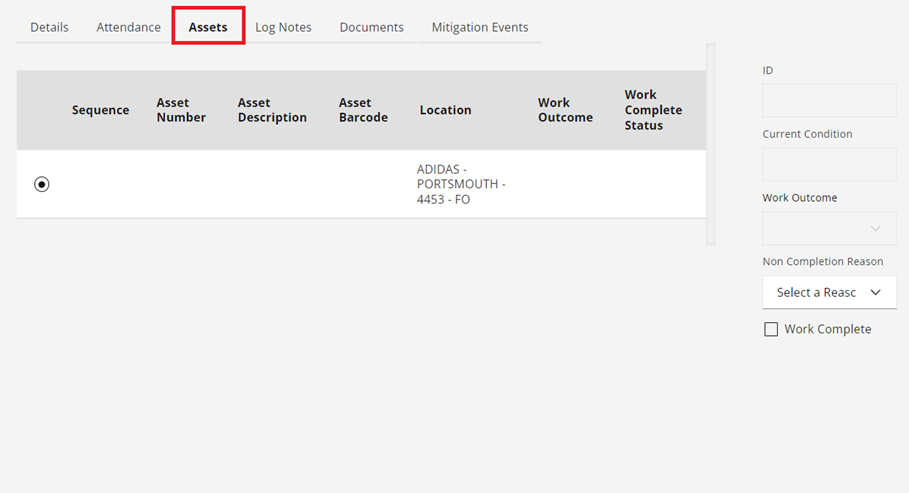
Go to ‘Assets’ tab.
-
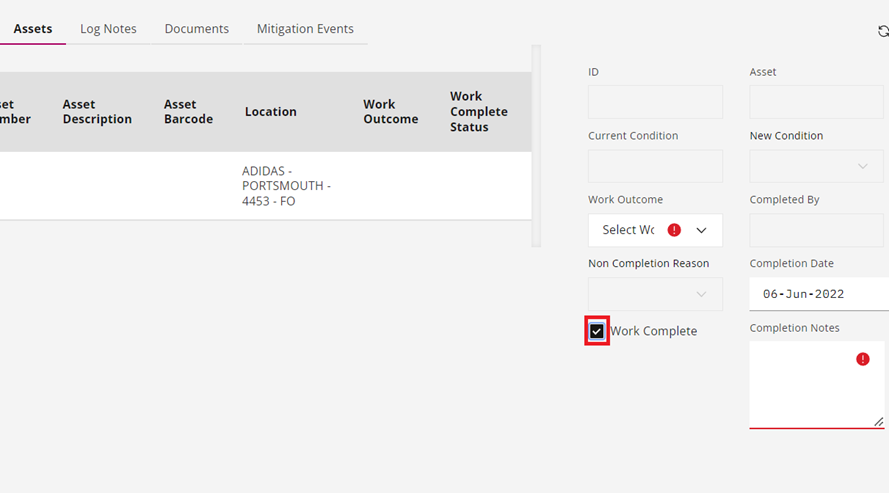
Tick the box next to ‘Work Complete’.
-
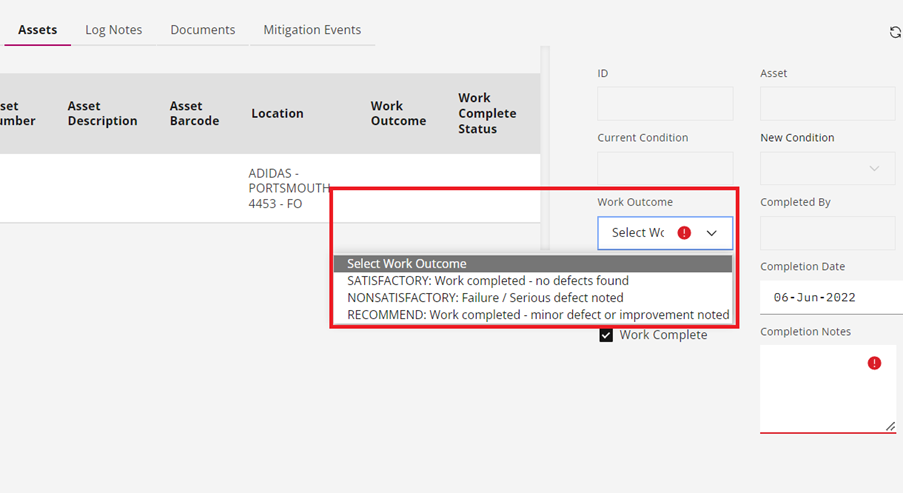
Select the relevant ‘Work Outcome’ from the drop-down options.
-
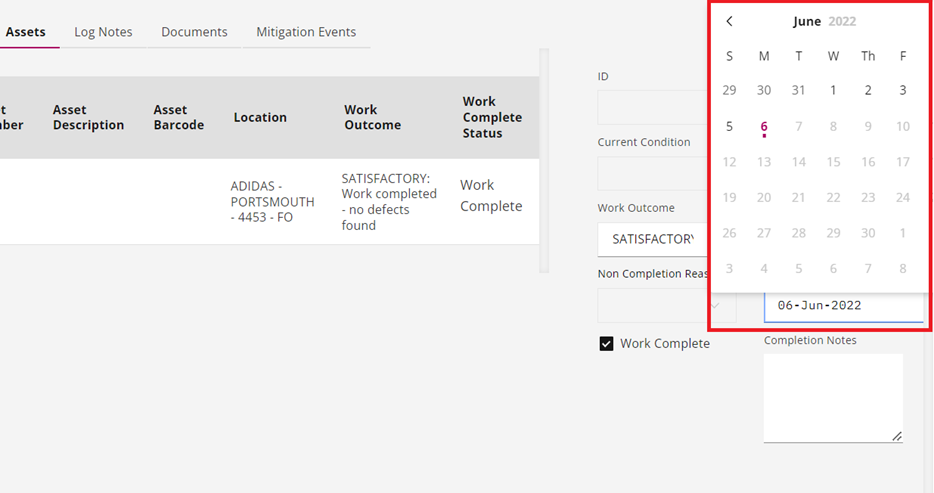
Select the ‘Completion’ Date using the calendar.
-
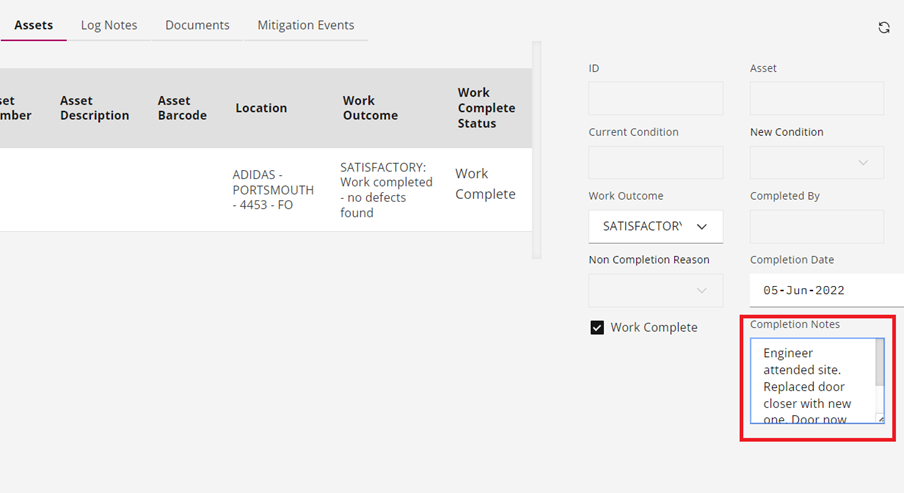
Add details regarding works done on site in ‘Completion Notes’.
-
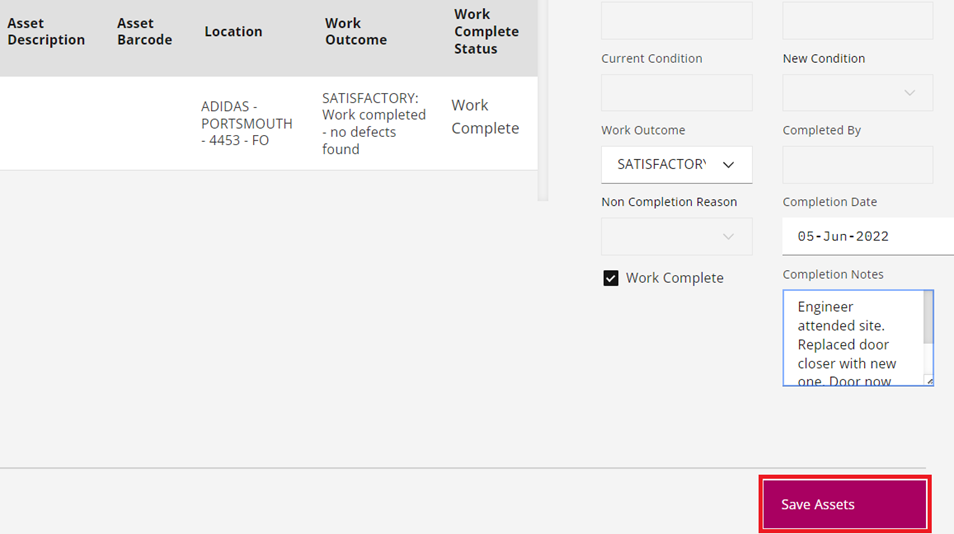
Click ‘Save Assets’.
(Note: The process should be repeated for each asset on the list.)
Watch a video on how to add asset updates.

How to update the Fault – Cause – Remedy on a job.
This section will help you to update the Fault – Cause – Remedy on a job.
.
-
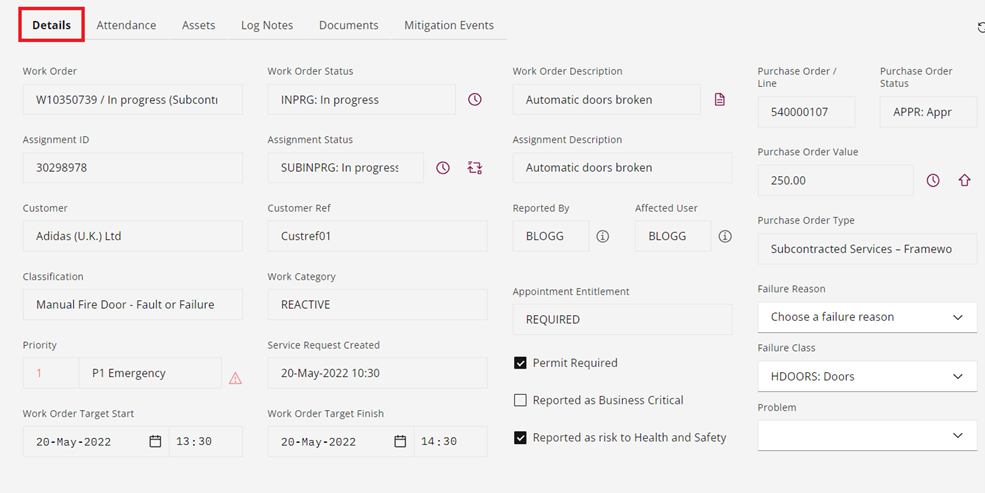
Go to ‘Details’ tab.
-
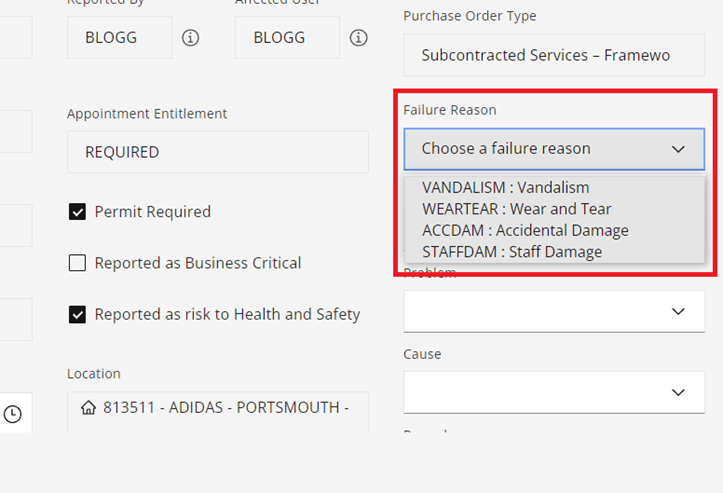
Select the ‘Failure Reason’ from the drop-down options.
-
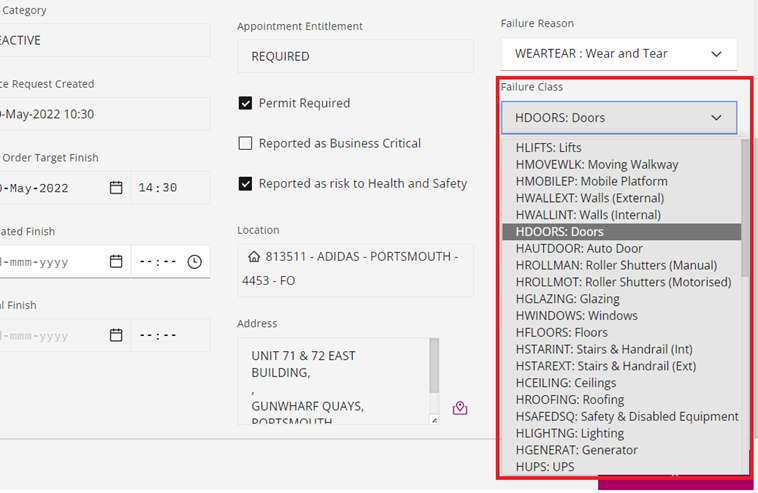
Select the ‘Failure Class’ from the drop-down options.
-
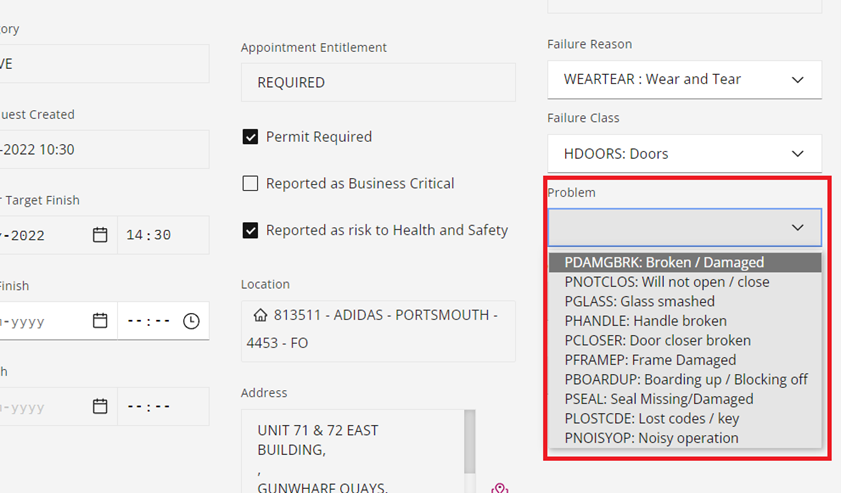
Select the ‘Problem’ from the drop-down options.
-
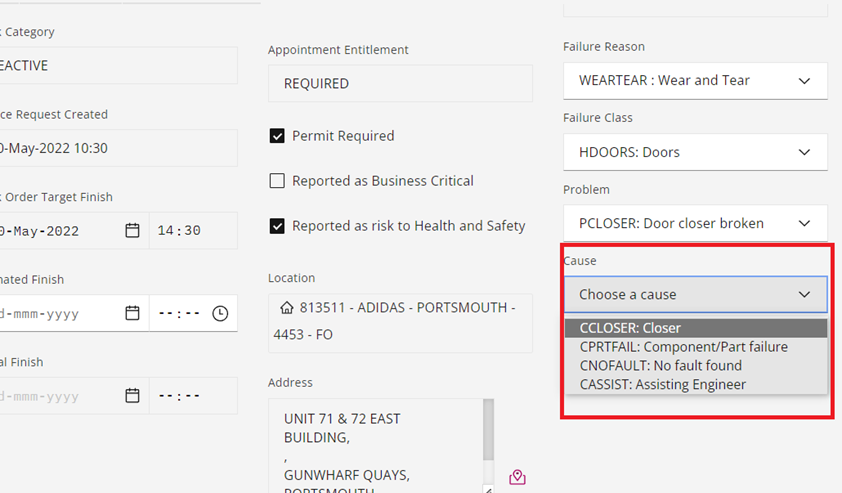
Select the ‘Cause’ from the drop-down options.
-
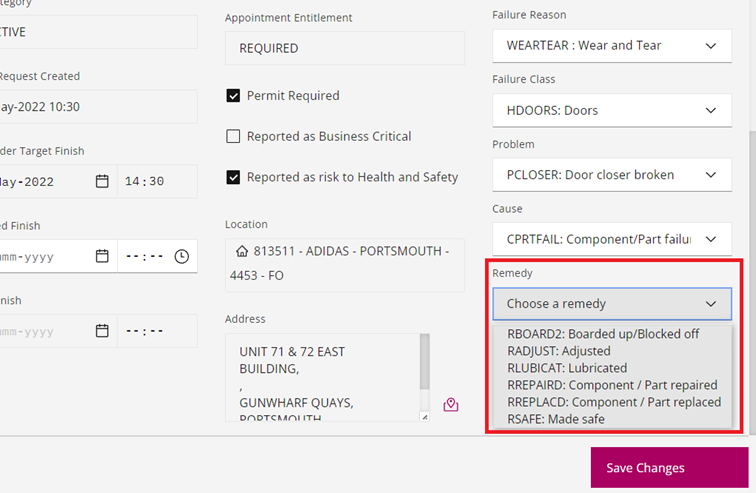
Select the ‘Remedy’ from the drop-down options.
-
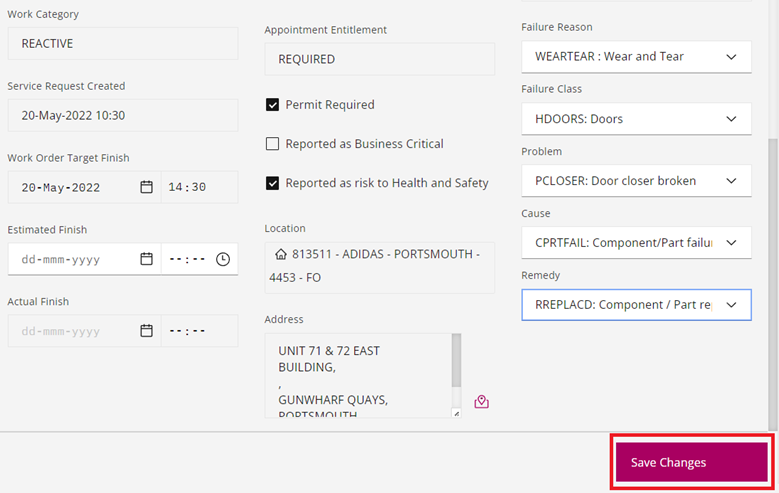
Click ‘Save Changes’.
(Note: Follow this process before changing the status in Completed.)
Watch a video on how to update the Fault – Cause – Remedy on a job.

How to to change status – Completed.
This section will help you to change status – Completed.
-
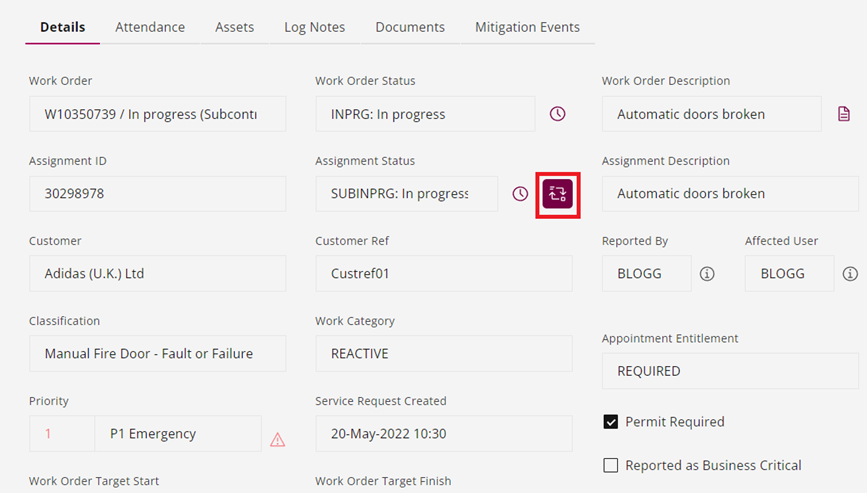
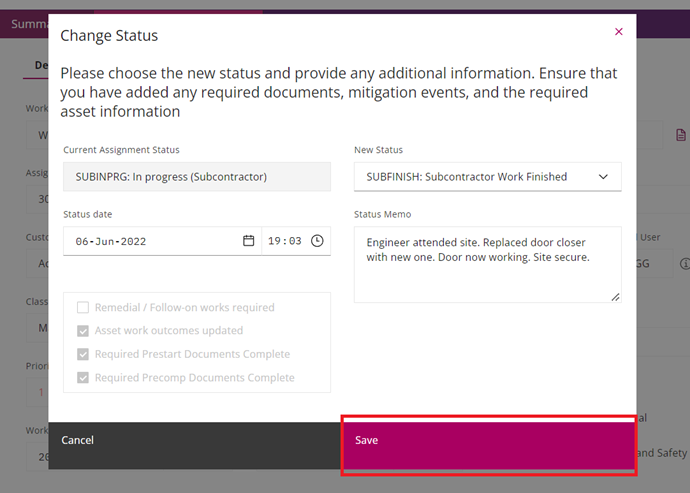
Click the icon next to ‘Assignment Status’.
(Note: A new pop-up window will open.)
-
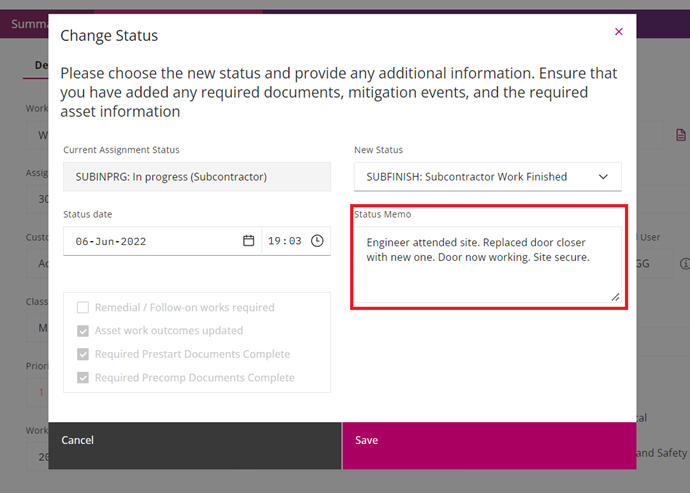
In ‘Status Memo’ box add a brief description of the works done in site.
(Note: As you can see the New Status is pre-selected as SUBFINISH: Subcontractor Work Finished.)
-
Click ‘Save’.
(Note: The job Assignment Status is now SUBENGCOMP: Awaiting recall period to end. Once the recall period is ended you can apply for payment using the Application for Payment.)
Watch a video on how to change status – Completed.
Milestone reached!
You have completed the training for Maximo 7.6 Subcontractor Portal – Job Management.
Click here for training on other modules.
If you have a question, please check out the FAQ’s .
If you cannot find the answer to your question please contact [email protected]
